

Les détecteurs de mouvement sont idéaux pour économiser de l'énergie et apporter du confort. Ils peuvent allumer automatiquement la lumière lorsqu'ils détectent une présence et l'éteindre lorsqu'aucun mouvement n'est détecté. Que ce soit pour une utilisation intérieure ou extérieure, un interrupteur à détecteur de mouvement est préférable à un interrupteur mécanique dans la plupart des cas.
Sommaire
- Étape 1. Préparer les outils pour l'installation
- Étape 2. Retirer l'ancien interrupteur
- Étape 3. Raccorder l'interrupteur à détecteur de mouvement
- Étape 4. Fixer l'interrupteur dans le boîtier d'encastrement
Les interrupteurs à détecteur de mouvement sont idéaux pour économiser de l'énergie et apporter du confort au domicile. Le détecteur de mouvement peut allumer automatiquement la lumière lorsque vous entrez dans la pièce et l'éteindre après votre départ. Un interrupteur à détecteur de mouvement est préférable à un luminaire à détecteur de mouvement pour un usage domestique car il est souvent nécessaire de conserver un contrôle manuel de l'éclairage. De plus, il est plus simple de remplacer un interrupteur mural traditionnel par un interrupteur à détecteur de mouvement que de remplacer l'ensemble du luminaire.
Il n'est jamais trop tard pour remplacer votre interrupteur mécanique manuel par un interrupteur intelligent activé par le mouvement. Le câblage et l'installation d'un interrupteur à détecteur de mouvement peuvent être simples et rapides.
Il n'est pas nécessaire de faire appel à un électricien. Il vous suffit de vous munir d'outils courants comme un tournevis présent dans chaque foyer et, en moins de 30 minutes, l'installation peut être réalisée, même pour les débutants sans connaissances en électricité.
Consulter la version vidéo de l'installation d'un interrupteur à détecteur de mouvement.
Pour suivre les instructions étape par étape, poursuivez la lecture.
Étape 1. Préparer les outils pour l'installation
Avant d'installer un interrupteur à détecteur de mouvement, préparez ces outils afin d'accélérer le processus.
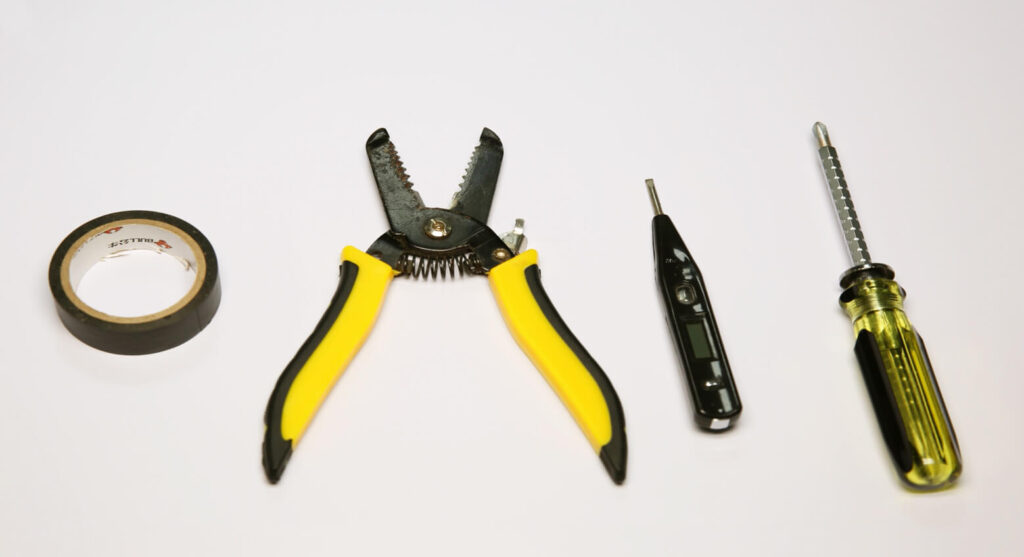
- Un interrupteur à détecteur de mouvement
- Tournevis
- En option
- Pince coupante : pour couper les fils si nécessaire
- Wire connectors: most motion sensor light switches would include wire connecters by default in the accessory pack
- Voltage tester: to identity the hotwire and ensure the voltage is off
- Electrical tapes: to mark the hotwire
Étape 2. Retirer l'ancien interrupteur
Turn off the breaker to the light you want to replace the switch of and turn on/off the existing switch several times to ensure there is no power.
Now we can safely remove the old switch. Suppose you have absolutely no electrical knowledge and worry about the wiring. In that case, you can take a picture of the existing wiring to apply similar wirings to the motion sensor light switch or even restore the old wiring and the switch.
Vous recherchez des solutions d’économie d’énergie activées par le mouvement ?
Contactez-nous pour obtenir une gamme complète de détecteurs de mouvement PIR, de produits d’économie d’énergie activés par le mouvement, d’interrupteurs à détecteur de mouvement et de solutions commerciales de présence/vacance.
Mark the hot wire(the black wire) with electrical tapes if necessary.
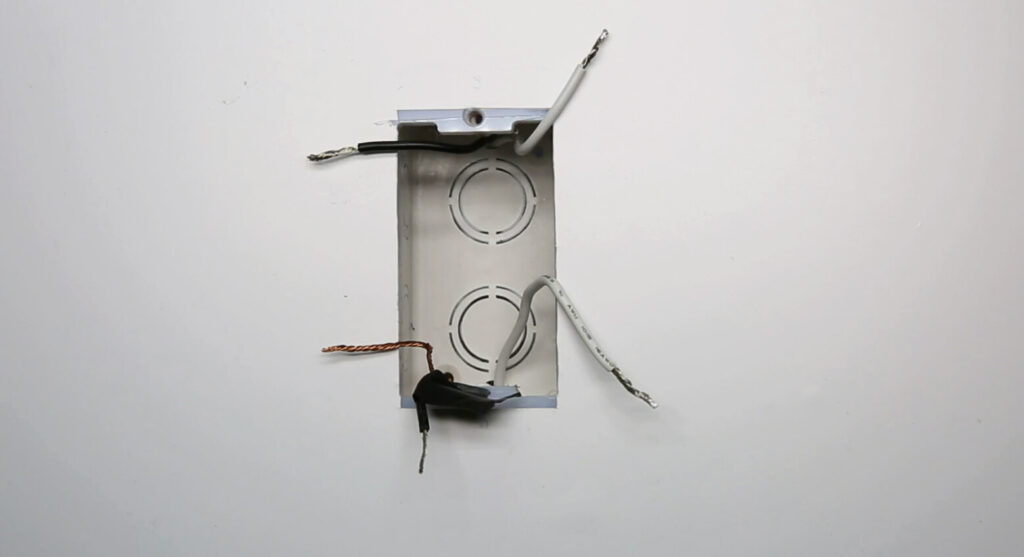
If you do not know which is load wire or hot wire, use the voltage tester to confirm with the following process:
- Turn on the breaker
- Move the voltage tester near each black wire
- The hotwire has power and the load wire does not have power
- Turn off the breaker
- Use the voltage near the hot wire to ensure the power is off
- Mark the hotwire with electrical tapes
Étape 3. Raccorder l'interrupteur à détecteur de mouvement
First, make sure the breaker is turned off and there is no power with a voltage tester.
Laissez-vous inspirer par les portfolios de détecteurs de mouvement Rayzeek.
Vous ne trouvez pas ce que vous cherchez ? Ne vous inquiétez pas. Il existe toujours d'autres solutions à vos besoins. L'un de nos portfolios peut sans doute vous aider.
Now we start wiring the motion sensor light switch to the light by connecting the wires with the same color.
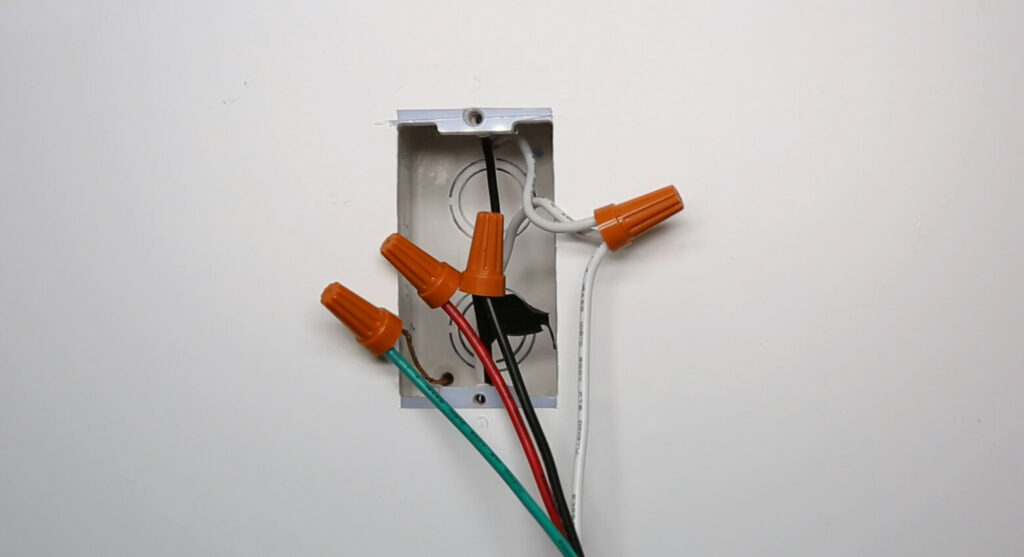
- Hotwire(black) to the light switch’s hotwire(black)
- Load wire(black or red) to the light switch’s load wire(red)
- Connect all neutral wires together (white)
- Connect all ground wires together(green or bare copper)
Now we partially screw the motion sensor switch into the wall box and test the wiring.
Turn on the breaker and the motion sensor light switch needs some time to warm up and will automatically turn on the light if the wiring is correct.
Ces produits pourraient vous intéresser

- Tension : 2 piles AAA
- Mode Jour/Nuit
- Temporisation : 15 min, 30 min, 1 h (par défaut), 2 h

- Détecteur de présence PIR pour montage au plafond avec sortie relais à contact sec
- Alimentation basse tension 12/24VDC ou 12/24VAC
- Contacts relais isolés COM, NO et NC pour les entrées de régulation CVC, GTC et de gestion de l'énergie

- Interrupteur détecteur de mouvement hyperfréquence encastré pour plafond basse tension continue
- Entrée 12 VDC / 24 VDC avec plage de 10-30 VDC
- Courant de fonctionnement maximal de 10A avec temporisation, seuil Lux et sensibilité réglables
- Interrupteur détecteur de mouvement à micro-ondes encastré au plafond pour charges plus élevées
- Entrée de tension secteur 100-265 VAC, modèle 10A
- Détection hyperfréquence (micro-ondes) 5,8 GHz avec temporisation, seuil Lux et sensibilité réglables
- Interrupteur détecteur de mouvement à micro-ondes encastré au plafond
- Entrée de tension secteur 100-265 VAC, modèle 5A
- Détection hyperfréquence (micro-ondes) 5,8 GHz avec temporisation, seuil Lux et sensibilité réglables
- Variateur détecteur de présence PIR RZ037 pour montage au plafond pour alimentation 220V
- Courant de fonctionnement maximal de 3A avec une charge nominale de 660W
- Le bouton LUX contrôle la marche/arrêt du capteur de lumière et la luminosité de variation réglée par l'utilisateur
- Variateur détecteur de présence PIR RZ037 pour montage au plafond pour alimentation 110V
- Courant de fonctionnement maximal de 3A avec une charge nominale de 330W
- Le bouton LUX contrôle la marche/arrêt du capteur de lumière et la luminosité de variation réglée par l'utilisateur

- Interrupteur détecteur de mouvement à micro-ondes basse tension CC pour montage au plafond
- Entrée 12 VDC / 24 VDC avec plage de 10-30 VDC
- Courant de fonctionnement maximal de 10A avec temporisation, seuil Lux et sensibilité réglables
- Interrupteur détecteur de mouvement à micro-ondes pour montage au plafond pour charges plus élevées
- Entrée de tension secteur 100-265 VAC, modèle 10A
- Détection hyperfréquence (micro-ondes) 5,8 GHz avec temporisation, seuil Lux et sensibilité réglables
- Interrupteur à détecteur de mouvement hyperfréquence pour montage au plafond
- Entrée de tension secteur 100-265 VAC, modèle 5A
- Détection hyperfréquence (micro-ondes) 5,8 GHz avec temporisation, seuil Lux et sensibilité réglables

- Interrupteur à détecteur de mouvement PIR encastré pour plafond à basse tension CC
- Entrée 12 VDC / 24 VDC avec plage de 10-30 VDC
- Courant de fonctionnement maximal de 10A avec temporisation, seuil Lux et sensibilité réglables

- Interrupteur à détecteur de mouvement PIR encastré pour plafond pour charges plus élevées
- Entrée de tension secteur 100-265 VAC, modèle 10A
- Détection à 360 degrés avec temporisation, seuil Lux et sensibilité réglables
- Interrupteur à détecteur de mouvement PIR encastré pour plafond
- Entrée de tension secteur 100-265 VAC, modèle 5A
- Détection à 360 degrés avec temporisation, seuil Lux et sensibilité réglables

- Kit d’interrupteur sans fil et récepteur pour le contrôle de l’éclairage intérieur MARCHE/ARRÊT
- Récepteur 100-230VAC, 50/60Hz avec courant nominal de 5A
- Interrupteur sans fil alimenté par pile CR2032 avec communication 2.4GHz
- Détection d'occupation (Auto-ON/Auto-OFF)
- 12–24V DC (10–30VDC), jusqu'à 10A
- Couverture 360°, diamètre de 8–12 m
- Temporisation 15 s–30 min
- Capteur de luminosité Désactivé/15/25/35 Lux
- Sensibilité Haute/Basse
- Mode d'occupation Auto-ON/Auto-OFF
- 100–265V AC, 10A (neutre requis)
- Couverture 360° ; diamètre de détection 8–12 m
- Temporisation 15 s–30 min ; Lux Désactivé/15/25/35 ; Sensibilité Haute/Basse
- Mode d'occupation Auto-ON/Auto-OFF
- 100–265V AC, 5A (neutre requis)
- Couverture 360° ; diamètre de détection 8–12 m
- Temporisation 15 s–30 min ; Lux Désactivé/15/25/35 ; Sensibilité Haute/Basse
Press the buttons on the light switch to see if you can successfully control the ON and OFF of the light.
Étape 4. Fixer l'interrupteur dans le boîtier d'encastrement
Strengthen the screws, install the cover plates, and adjust the switch to a straight position.
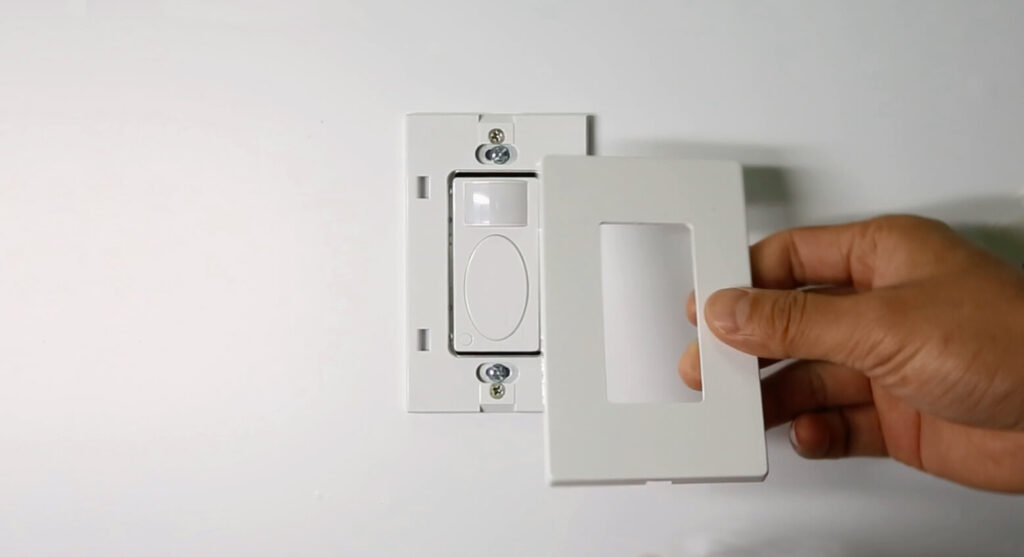
Now you can adjust the functions of the motion sensor light switch to a proper setting according to the user manual, such as occupancy sensor and vacancy sensor motion detection mode, time delay, and ambient light sensing.







