

Motion sensors are great at saving energy and bringing convenience. They can automatically turn on the light for us when detecting motion from a person and turn off the light for us when no motion is detected. Whether it’s outdoor or indoor usage, a interruptor com sensor de movimento is better than a mechanical light switch in most cases.
Índice
- Step 1. Prepare tools for the installation
- Step 2. Remove the Old Switch
- Step 3. Wire the Motion Sensor Light Switch
- Step 4. Fix the Switch Into the Wallbox
Motion sensor light switches are great at saving energy and bringing convenience to our home. The motion sensor detector can automatically turn on the light for us when we enter the room and turn off the light after we leave. A motion sensor light switch is more preferred than a motion sensor light for home use because we need to manually take control of the light most of the time. And it’s easier to simply upgrade the traditional wall switch with a motion sensor light switch than to replace the light fixture.
It’s never too late to replace your manual mechanical light switch with a smart, motion-activated one, and wiring and installing a motion sensor light switch can be fast and easy.
You don’t need to call an electrician for the job. All you need is some common tools like a screwdriver that every home has (you don’t own a screwdriver?) and within 30 minutes, you can get the job done even for beginners with no electrical knowledge.
Check the video version of installing a motion sensor light switch.
If you want a step by step instruction to follow, keep reading.
Step 1. Prepare tools for the installation
Before we install a motion sensor light switch, prepare these tools first so we can speed up the process.

- A motion sensor light switch
- Chave de fendas
- Opcional
- Alicate corta-cabos: para cortar fios, se necessário
- Conectores de cabos: a maioria dos interruptores de luz com sensor de movimento inclui conectores de cabos por predefinição no pacote de acessórios
- Voltage tester: to identity the hotwire and ensure the voltage is off
- Fita isoladora: para marcar o fio de fase
Step 2. Remove the Old Switch
Turn off the breaker to the light you want to replace the switch of and turn on/off the existing switch several times to ensure there is no power.
Now we can safely remove the old switch. Suppose you have absolutely no electrical knowledge and worry about the wiring. In that case, you can take a picture of the existing wiring to apply similar wirings to the motion sensor light switch or even restore the old wiring and the switch.
Procura Soluções de Poupança de Energia Ativadas por Movimento?
Contacte-nos para soluções completas de sensores de movimento PIR, produtos de poupança de energia ativados por movimento, interruptores com sensor de movimento e soluções comerciais de ocupação/vacância.
Mark the hot wire(the black wire) with electrical tapes if necessary.
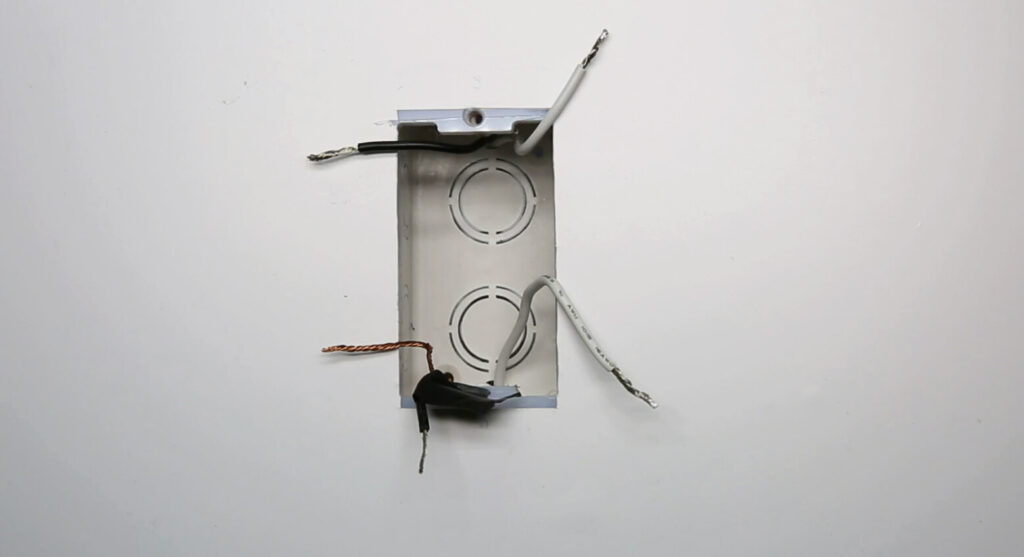
If you do not know which is load wire or hot wire, use the voltage tester to confirm with the following process:
- Turn on the breaker
- Move the voltage tester near each black wire
- The hotwire has power and the load wire does not have power
- Turn off the breaker
- Use the voltage near the hot wire to ensure the power is off
- Mark the hotwire with electrical tapes
Step 3. Wire the Motion Sensor Light Switch
First, make sure the breaker is turned off and there is no power with a voltage tester.
Inspire-se com os portfólios de sensores de movimento da Rayzeek.
Não encontra o que pretende? Não se preocupe. Existem sempre formas alternativas de resolver os seus problemas. Talvez um dos nossos portfólios possa ajudar.
Now we start wiring the motion sensor light switch to the light by connecting the wires with the same color.
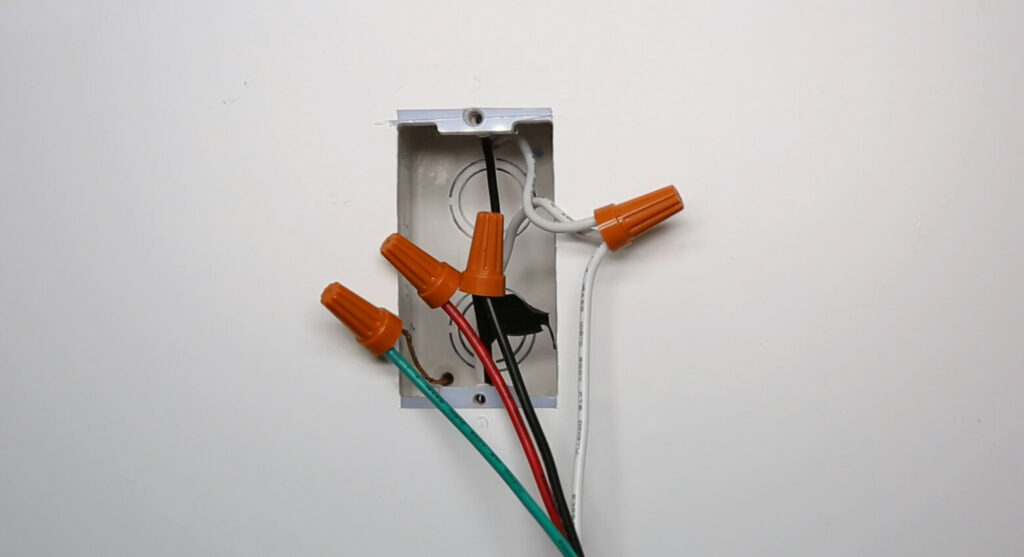
- Hotwire(black) to the light switch’s hotwire(black)
- Load wire(black or red) to the light switch’s load wire(red)
- Connect all neutral wires together (white)
- Connect all ground wires together(green or bare copper)
Now we partially screw the motion sensor switch into the wall box and test the wiring.
Turn on the breaker and the motion sensor light switch needs some time to warm up and will automatically turn on the light if the wiring is correct.
Poderá Também Estar Interessado Em

- Tensão: 2 pilhas AAA
- Modo Dia/Noite
- Temporização: 15min, 30min, 1h(padrão), 2h

- Sensor de presença PIR para montagem no teto com saída de relé de contacto seco
- Alimentação de baixa tensão de 12/24VDC ou 12/24VAC
- Contactos de relé isolados COM, NO e NC para entradas de controlo de edifícios, HVAC e EMS

- Interruptor com sensor de movimento por micro-ondas encastrável no teto de baixa tensão DC
- Entrada de 12 VDC / 24 VDC com intervalo de 10-30 VDC
- Corrente máxima de trabalho de 10A com temporizador, limiar Lux e sensibilidade ajustáveis
- Interruptor com sensor de movimento de micro-ondas encastrável no teto para cargas mais elevadas
- Entrada de tensão de linha de 100-265 VAC, modelo de 10A
- Deteção por micro-ondas a 5,8 GHz com temporizador, limiar Lux e sensibilidade ajustáveis
- Interruptor com sensor de movimento de micro-ondas encastrável no teto
- Entrada de tensão de linha de 100-265 VAC, modelo de 5A
- Deteção por micro-ondas a 5,8 GHz com temporizador, limiar Lux e sensibilidade ajustáveis
- Dimmer com sensor de presença PIR RZ037 de montagem no teto para alimentação de 220V
- Corrente máxima de funcionamento de 3A com carga nominal de 660W
- O botão LUX controla o sensor de luz ON/OFF e o brilho de regulação definido pelo utilizador
- Dimmer com sensor de presença PIR RZ037 de montagem no teto para alimentação de 110V
- Corrente máxima de funcionamento de 3A com carga nominal de 330W
- O botão LUX controla o sensor de luz ON/OFF e o brilho de regulação definido pelo utilizador

- Interruptor com sensor de movimento por micro-ondas de montagem no teto em DC de baixa tensão
- Entrada de 12 VDC / 24 VDC com intervalo de 10-30 VDC
- Corrente máxima de trabalho de 10A com temporizador, limiar Lux e sensibilidade ajustáveis
- Interruptor de sensor de movimento por micro-ondas para montagem no teto para cargas mais elevadas
- Entrada de tensão de linha de 100-265 VAC, modelo de 10A
- Deteção por micro-ondas a 5,8 GHz com temporizador, limiar Lux e sensibilidade ajustáveis
- Interruptor de sensor de movimento por micro-ondas para montagem no teto
- Entrada de tensão de linha de 100-265 VAC, modelo de 5A
- Deteção por micro-ondas a 5,8 GHz com temporizador, limiar Lux e sensibilidade ajustáveis

- Interruptor de sensor de movimento PIR para montagem de embutir no teto em CC de baixa tensão
- Entrada de 12 VDC / 24 VDC com intervalo de 10-30 VDC
- Corrente máxima de trabalho de 10A com temporizador, limiar Lux e sensibilidade ajustáveis

- Interruptor de sensor de movimento PIR para montagem de embutir no teto para cargas mais elevadas
- Entrada de tensão de linha de 100-265 VAC, modelo de 10A
- Deteção de 360 graus com temporizador, limiar Lux e sensibilidade ajustáveis
- Interruptor de sensor de movimento PIR para montagem de embutir no teto
- Entrada de tensão de linha de 100-265 VAC, modelo de 5A
- Deteção de 360 graus com temporizador, limiar Lux e sensibilidade ajustáveis

- Kit de interruptor sem fios e recetor para controlo de iluminação interior ON/OFF
- Recetor de 100-230VAC, 50/60Hz com corrente nominal de 5A
- Interruptor sem fios alimentado a pilha CR2032 com comunicação a 2.4GHz
- Ocupação (Ligado automático/Desligado automático)
- 12–24V DC (10–30VDC), até 10A
- Cobertura de 360°, diâmetro de 8–12 m
- Temporização de 15 s–30 min
- Sensor de luz Desligado/15/25/35 Lux
- Sensibilidade Alta/Baixa
- Modo de presença Ligado Automático/Desligado Automático
- 100–265V AC, 10A (neutro necessário)
- Cobertura de 360°; diâmetro de deteção de 8–12 m
- Temporização de 15 s–30 min; Lux Desligado/15/25/35; Sensibilidade Alta/Baixa
- Modo de presença Ligado Automático/Desligado Automático
- 100–265V AC, 5A (neutro necessário)
- Cobertura de 360°; diâmetro de deteção de 8–12 m
- Temporização de 15 s–30 min; Lux Desligado/15/25/35; Sensibilidade Alta/Baixa
Press the buttons on the light switch to see if you can successfully control the ON and OFF of the light.
Step 4. Fix the Switch Into the Wallbox
Strengthen the screws, install the cover plates, and adjust the switch to a straight position.
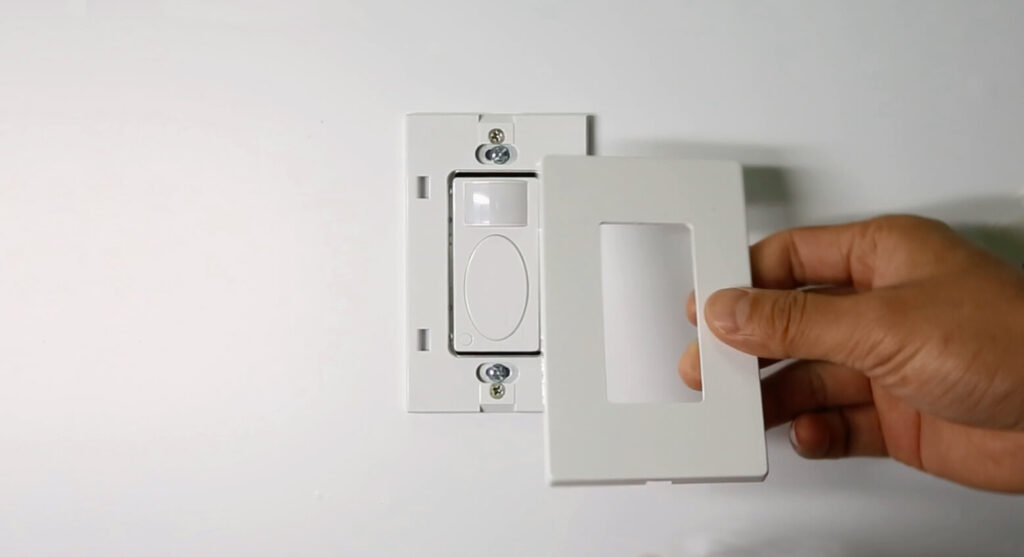
Now you can adjust the functions of the motion sensor light switch to a proper setting according to the user manual, such as occupancy sensor and vacancy sensor motion detection mode, time delay, and ambient light sensing.







