

Motion sensors are great at saving energy and bringing convenience. They can automatically turn on the light for us when detecting motion from a person and turn off the light for us when no motion is detected. Whether it’s outdoor or indoor usage, a strömbrytare med rörelsesensor is better than a mechanical light switch in most cases.
Innehåll
- Step 1. Prepare tools for the installation
- Step 2. Remove the Old Switch
- Step 3. Wire the Motion Sensor Light Switch
- Step 4. Fix the Switch Into the Wallbox
Motion sensor light switches are great at saving energy and bringing convenience to our home. The motion sensor detector can automatically turn on the light for us when we enter the room and turn off the light after we leave. A motion sensor light switch is more preferred than a motion sensor light for home use because we need to manually take control of the light most of the time. And it’s easier to simply upgrade the traditional wall switch with a motion sensor light switch than to replace the light fixture.
It’s never too late to replace your manual mechanical light switch with a smart, motion-activated one, and wiring and installing a motion sensor light switch can be fast and easy.
You don’t need to call an electrician for the job. All you need is some common tools like a screwdriver that every home has (you don’t own a screwdriver?) and within 30 minutes, you can get the job done even for beginners with no electrical knowledge.
Check the video version of installing a motion sensor light switch.
If you want a step by step instruction to follow, keep reading.
Step 1. Prepare tools for the installation
Before we install a motion sensor light switch, prepare these tools first so we can speed up the process.
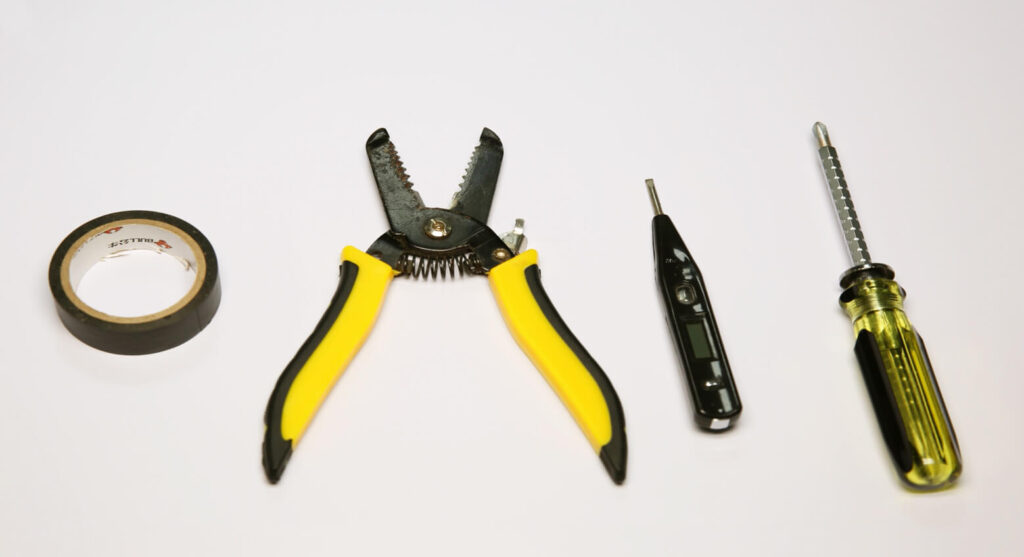
- A motion sensor light switch
- Screwdriver
- Optional
- Wirecutter: to cut wires if necessary
- Wire connectors: most motion sensor light switches would include wire connecters by default in the accessory pack
- Voltage tester: to identity the hotwire and ensure the voltage is off
- Electrical tapes: to mark the hotwire
Step 2. Remove the Old Switch
Turn off the breaker to the light you want to replace the switch of and turn on/off the existing switch several times to ensure there is no power.
Now we can safely remove the old switch. Suppose you have absolutely no electrical knowledge and worry about the wiring. In that case, you can take a picture of the existing wiring to apply similar wirings to the motion sensor light switch or even restore the old wiring and the switch.
Letar du efter rörelsestyrda energisparande lösningar?
Kontakta oss för kompletta PIR-rörelsesensorer, rörelseaktiverade energisparprodukter, rörelsesensorbrytare och kommersiella lösningar för närvaro/frånvaro (Occupancy/Vacancy).
Mark the hot wire(the black wire) with electrical tapes if necessary.
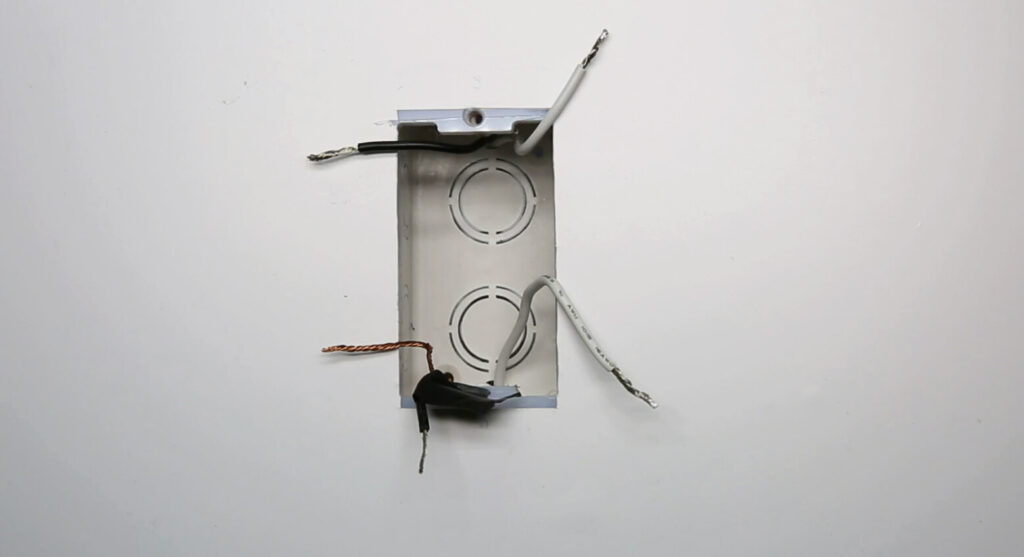
If you do not know which is load wire or hot wire, use the voltage tester to confirm with the following process:
- Turn on the breaker
- Move the voltage tester near each black wire
- The hotwire has power and the load wire does not have power
- Turn off the breaker
- Use the voltage near the hot wire to ensure the power is off
- Mark the hotwire with electrical tapes
Step 3. Wire the Motion Sensor Light Switch
First, make sure the breaker is turned off and there is no power with a voltage tester.
Hitta inspiration i Rayzeeks portfölj av rörelsesensorer.
Hittar du inte det du söker? Oroa dig inte. Det finns alltid alternativa sätt att lösa dina problem. Kanske kan någon av våra portföljer hjälpa till.
Now we start wiring the motion sensor light switch to the light by connecting the wires with the same color.
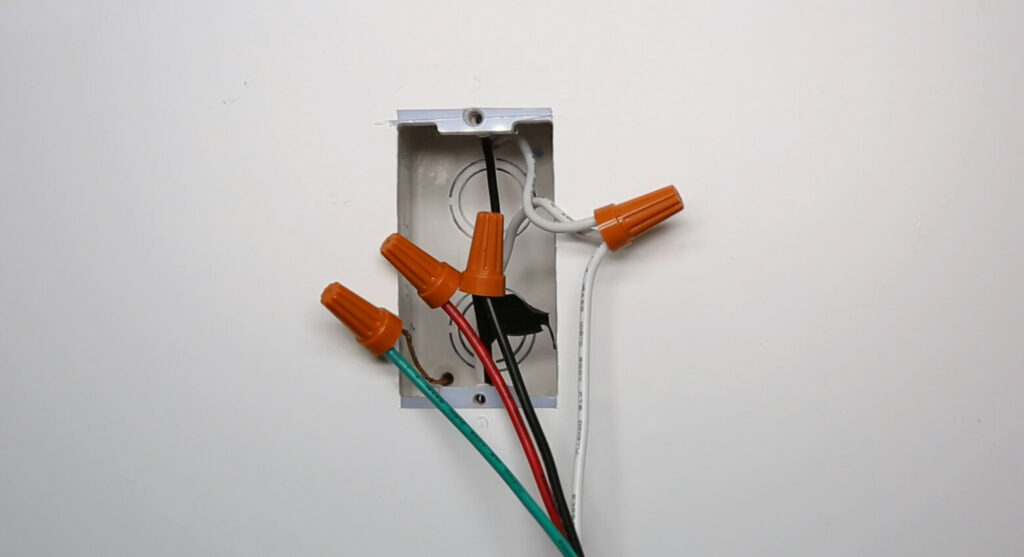
- Hotwire(black) to the light switch’s hotwire(black)
- Load wire(black or red) to the light switch’s load wire(red)
- Connect all neutral wires together (white)
- Connect all ground wires together(green or bare copper)
Now we partially screw the motion sensor switch into the wall box and test the wiring.
Turn on the breaker and the motion sensor light switch needs some time to warm up and will automatically turn on the light if the wiring is correct.
Du kanske också är intresserad av

- Spänning: 2 AAA-batterier
- Dag-/nattläge
- Tidsfördröjning: 15 min, 30 min, 1 tim (standard), 2 tim

- Takmonterad PIR-närvarosensor med reläutgång för potentialfri kontakt
- 12/24VDC eller 12/24VAC lågspänningsförsörjning
- Isolerade reläkontakter (COM, NO och NC) för styringångar till EMS, VVS och fastighetsautomation

- Lågspänningsdriven (DC) infälld mikrovågsrörelsevakt för tak montering
- 12 VDC / 24 VDC-ingång med ett driftsområde på 10–30 VDC
- Maximal arbetsström på 10A med inställbar tidsfördröjning, Lux-tröskelvärde och känslighet
- Infälld mikrovågsrörelsevakt för tak avsedd för högre belastning
- 100–265 VAC nätspänningsingång, 10A-modell
- 5,8 GHz mikrovågsdetektering med inställbar tidsfördröjning, Lux-tröskelvärde och känslighet
- Infälld takmonterad mikrovågsrörelsesensorbrytare
- 100–265 VAC nätspänningsingång, 5A-modell
- 5,8 GHz mikrovågsdetektering med inställbar tidsfördröjning, Lux-tröskelvärde och känslighet
- Takmonterad RZ037 PIR-närvarosensordimmer för 220V-ström
- 3A maximal arbetsström med 660W märkeffekt
- LUX-knapp styr ljussensor PÅ/AV och användarinställd dimringsnivå
- Takmonterad RZ037 PIR-närvarosensordimmer för 110V-ström
- 3A maximal arbetsström med 330W märkeffekt
- LUX-knapp styr ljussensor PÅ/AV och användarinställd dimringsnivå

- Lågspännings-DC takmonterad mikrovågsrörelsesensorbrytare
- 12 VDC / 24 VDC-ingång med ett driftsområde på 10–30 VDC
- Maximal arbetsström på 10A med inställbar tidsfördröjning, Lux-tröskelvärde och känslighet
- Takmonterad mikrovågsrörelsesensorbrytare för högre belastning
- 100–265 VAC nätspänningsingång, 10A-modell
- 5,8 GHz mikrovågsdetektering med inställbar tidsfördröjning, Lux-tröskelvärde och känslighet
- Takmonterad mikrovågsrörelsesensorbrytare
- 100–265 VAC nätspänningsingång, 5A-modell
- 5,8 GHz mikrovågsdetektering med inställbar tidsfördröjning, Lux-tröskelvärde och känslighet

- Lågspännings-DC infälld takmonterad PIR-rörelsesensorströmbrytare
- 12 VDC / 24 VDC-ingång med ett driftsområde på 10–30 VDC
- Max arbetsström 10A med inställbar tidsfördröjning, Lux-tröskelvärde och känslighet

- Infälld takmonterad PIR-rörelsesensorströmbrytare för högre belastning
- 100–265 VAC nätspänningsingång, 10A-modell
- 360-graders detektering med inställbar tidsfördröjning, Lux-tröskelvärde och känslighet
- Infälld takmonterad PIR-rörelsesensorströmbrytare
- 100–265 VAC nätspänningsingång, 5A-modell
- 360-graders detektering med inställbar tidsfördröjning, Lux-tröskelvärde och känslighet

- Trådlöst strömbrytar- och mottagarkit för inomhus belysningsstyrning ON/OFF
- 100-230VAC, 50/60Hz-mottagare med 5A märkström
- CR2032-driven trådlös strömbrytare med 2,4GHz-kommunikation
- Närvaro (Auto-ON/Auto-OFF)
- 12–24V DC (10–30VDC), upp till 10A
- 360° täckning, 8–12 m diameter
- Tidsfördröjning 15 s–30 min
- Ljussensor Off/15/25/35 Lux
- Hög/Låg känslighet
- Automatisk På/Automatisk Av närvaroläge
- 100–265V AC, 10A (nolla krävs)
- 360° täckning; 8–12 m detekteringsdiameter
- Tidsfördröjning 15 s–30 min; Lux AV/15/25/35; Känslighet Hög/Låg
- Automatisk På/Automatisk Av närvaroläge
- 100–265V AC, 5A (nolla krävs)
- 360° täckning; 8–12 m detekteringsdiameter
- Tidsfördröjning 15 s–30 min; Lux AV/15/25/35; Känslighet Hög/Låg
Press the buttons on the light switch to see if you can successfully control the ON and OFF of the light.
Step 4. Fix the Switch Into the Wallbox
Strengthen the screws, install the cover plates, and adjust the switch to a straight position.
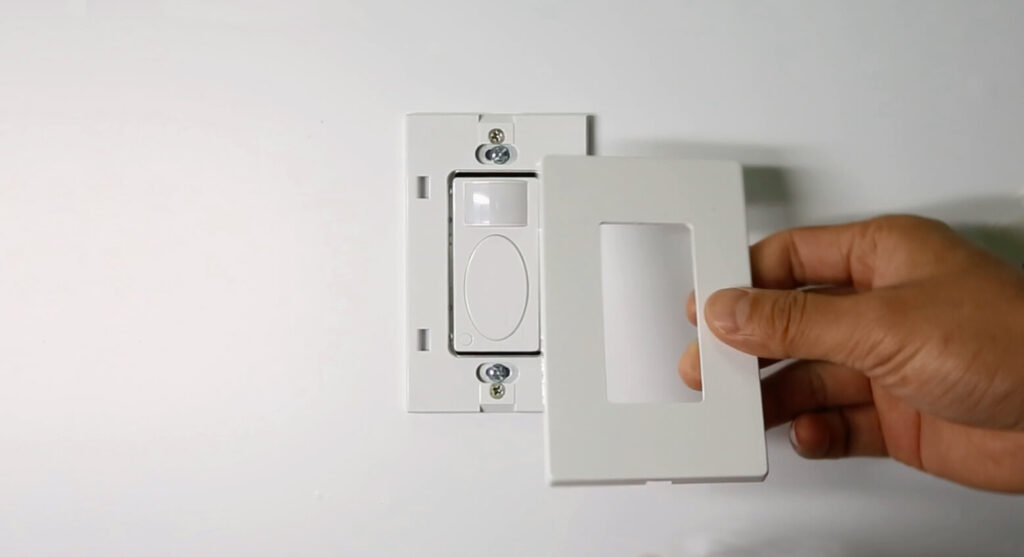
Now you can adjust the functions of the motion sensor light switch to a proper setting according to the user manual, such as occupancy sensor and vacancy sensor motion detection mode, time delay, and ambient light sensing.







