
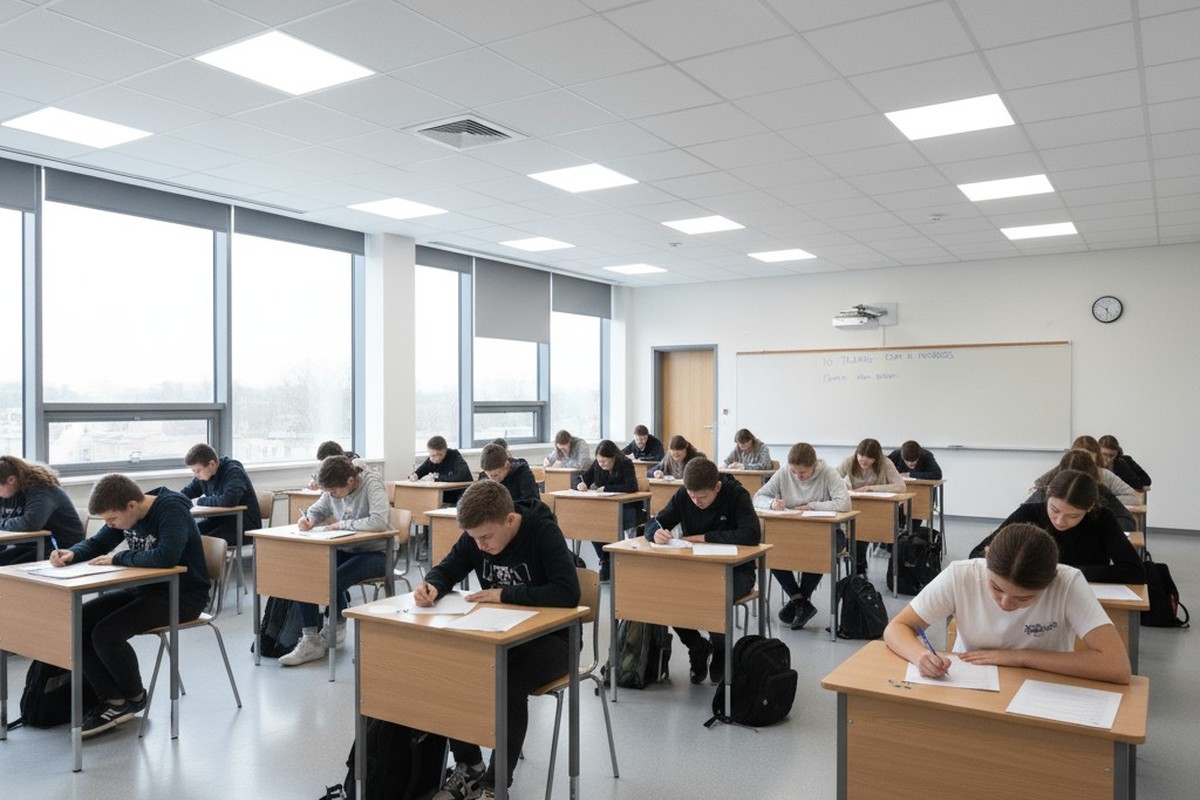
Classrooms have a unique set of environmental demands that generic lighting automation often fails to meet. During a lecture, lighting must be stable to avoid disrupting the flow of instruction. During an exam, even a minor disturbance—lights suddenly extinguishing or snapping to full brightness—can shatter student concentration. When a projector is on, any unplanned activation of overhead lighting creates glare, rendering the screen unreadable and frustrating the teacher.
The difference between seamless automation and persistent friction lies in precise configuration.
While motion sensors are a clear solution to energy waste in schools, their default settings are designed for hallways and storage rooms, not active classrooms. The challenge isn’t whether to use sensors, but how to configure them for the realities of teaching and testing. A ceiling-mounted PIR sensor can deliver reliable automation, but only when its coverage, timing, and activation logic are calibrated to the space. This playbook maps Rayzeek sensor capabilities to the practical demands of education, providing the specific configurations needed for a confident, district-scale deployment.
Why Classroom Lighting Automation Demands Precision
The energy savings from automated classroom lighting are measurable and the operational efficiency is clear. But success or failure hinges on how that automation behaves in the real world. A classroom is not a hallway. Its occupancy patterns are different, the tolerance for disruption is lower, and the consequences of a poorly timed sensor response are far greater.
Imagine an exam in progress. Thirty students sit motionless, heads down, their movements confined to the small gestures of writing. A standard motion sensor with a five-minute timeout interprets this stillness as vacancy and extinguishes the lights. The disruption is immediate and total. Students lose focus, the proctor must intervene, and the incident generates a complaint that travels up the administrative chain. The sensor performed as programmed, but the programming assumed a level of movement that simply doesn’t exist during focused, seated work.
This same mismatch creates havoc when projectors are in use. A teacher dims the overhead lights for better screen contrast and begins a presentation. As they move toward the door to adjust the window blinds, the motion triggers a wall-mounted sensor, which brings the lights back to full brightness. The screen washes out. The lesson loses momentum as the teacher stops to fix the lighting. This isn’t a failure of detection; it’s a failure of mode selection. The sensor was set to an occupancy mode that activates on any motion, when the situation required a vacancy mode that respects manual control.
These are not edge cases; they are the predictable outcomes of a one-size-fits-all approach. The solution isn’t to abandon automation, but to deploy it with a deep understanding of how coverage area, timeout duration, and activation mode serve the specific activities happening inside the classroom.
How Ceiling PIR Coverage Translates to Classroom Geometry
The effectiveness of a ceiling-mounted motion sensor starts with its ability to see the entire occupied area of a room. Passive infrared (PIR) sensors work by sensing changes in heat signatures, and their field of view is shaped by mounting height and lens design. For any classroom, the first question is whether a single sensor can eliminate all blind spots.
Coverage Radius and the Standard Classroom
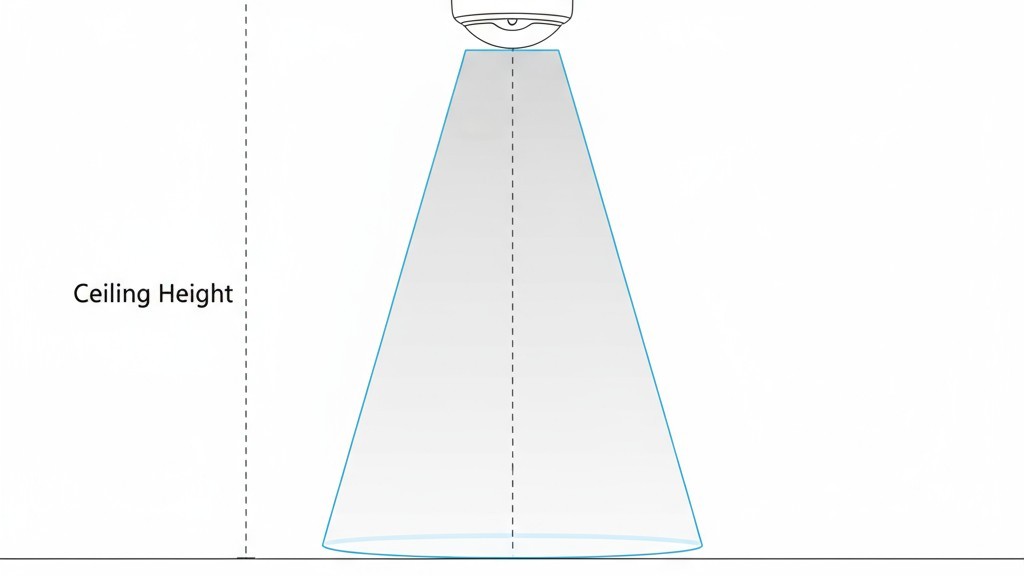
A typical Rayzeek ceiling PIR sensor, mounted at a standard nine-foot ceiling height, offers a detection radius of 16 to 20 feet. This creates a circular coverage area where detection is strongest directly beneath the sensor and diminishes slightly toward the perimeter.
從 Rayzeek 動態感測器產品組合中獲得靈感。
找不到您想要的產品?別擔心。總有其他方法可以解決您的問題。也許我們的其中一個產品組合可以幫到您。
For a standard classroom—often around 24 by 30 feet (720 sq. ft.)—a single, centrally mounted sensor provides excellent coverage. The 16-foot radius ensures that movement in all four quadrants, including the corners, will trigger a response. Mounting height directly affects the coverage area. A 12-foot ceiling expands the sensor’s effective radius, while a lower ceiling compresses the circle but increases sensitivity at the edge. A 20-foot radius translates to a coverage area of over 1,200 square feet, meaning most elementary and secondary classrooms fall well within the envelope of a single sensor.
Single-Sensor Viability for Typical Layouts
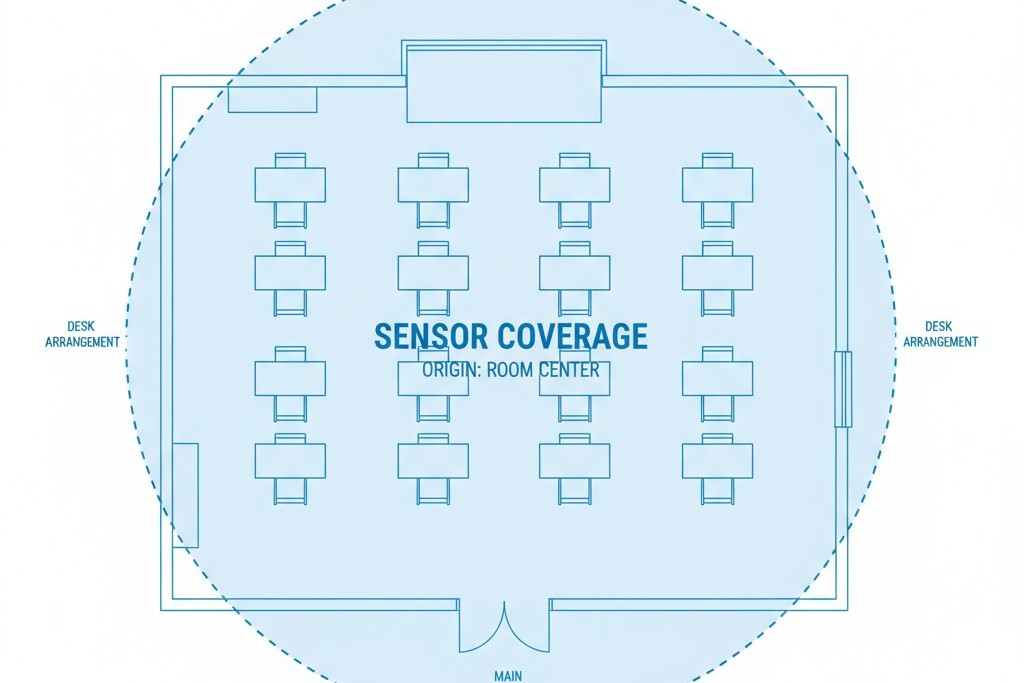
Most classrooms are rectangular, ranging from 24×24 ft. to 30×36 ft. In these layouts, placing a single Rayzeek sensor at the geometric center of the room prevents detection gaps. This central position ensures that even the farthest corners remain within the detection cone. For a 30×30 ft. classroom, the distance from the center to a corner is about 21 feet. A sensor with a 20-foot effective radius will still reliably detect a student moving in that corner seat.
The viability of a single sensor is reinforced by the nature of classroom activity itself. Unlike an open office where someone might work in an isolated corner for hours, classrooms generate distributed movement. A teacher circulates. Students shift in their seats, raise their hands, or walk to the whiteboard. This diffuse pattern of motion ensures that even if one corner is momentarily still, another area of the room provides the input needed to keep the lights on.
When Multi-Sensor Zones Become Necessary
Larger or irregularly shaped classrooms may require a second sensor. Rooms exceeding 900 square feet, especially long and narrow ones, can push a single sensor beyond its effective range. In a 20×50 ft. classroom, for instance, the ends of the room are more than 25 feet from the center, creating potential dead zones.
Here, a zoned approach with two sensors eliminates coverage gaps. Each sensor covers half the room, with their detection areas overlapping in the middle. Both sensors can be wired in parallel to the same lighting circuit, so motion detected by either one keeps the lights on for the entire space.
Specialized rooms also warrant a multi-sensor strategy. Science labs with tall cabinets, art rooms with partitions, and workshops with large equipment create physical obstructions. A single sensor mounted over a central island in a science lab might not see students working at perimeter benches. Adding a second sensor near the perimeter—or choosing a dual-technology sensor that combines PIR with ultrasonic detection to “see” around obstacles—solves the problem without major infrastructure changes.
Mounting Position Strategy for Common Furniture Arrangements
A sensor’s coverage radius defines its potential, but the room’s furniture arrangement determines its real-world performance. Desks, tables, and cabinets create microclimates of movement and stillness that the mounting position must account for.
Row Seating and Forward-Facing Desks
Traditional row seating is the easiest layout to cover. Student motion is small-scale—writing, shifting posture—while the teacher provides larger motion walking the aisles or standing at the front. Central ceiling mounting works perfectly here, giving the sensor a clear overhead view. The only caveat is to avoid mounting it too close to the front or back wall. A central position balances detection across all rows, ensuring students in the back are not at the fringe of the detection radius. If tall cabinets line the walls, positioning the sensor slightly forward of true center can help it maintain a clear line of sight over them.
Cluster Tables and Collaborative Layouts
Classrooms designed for collaboration often use cluster tables where groups of students sit together. This arrangement changes the movement profile. Students lean inward, reducing their vertical profile, and pass materials laterally instead of walking. To ensure reliable detection, mount the sensor closer to the primary instructional area at the front of the room. This captures the teacher’s movement as a baseline. To supplement this, ensure at least one cluster table is positioned within 12 to 15 feet of the sensor, well inside its high-sensitivity core, to pick up on quieter student collaboration.
Lab Benches and Specialized Classrooms
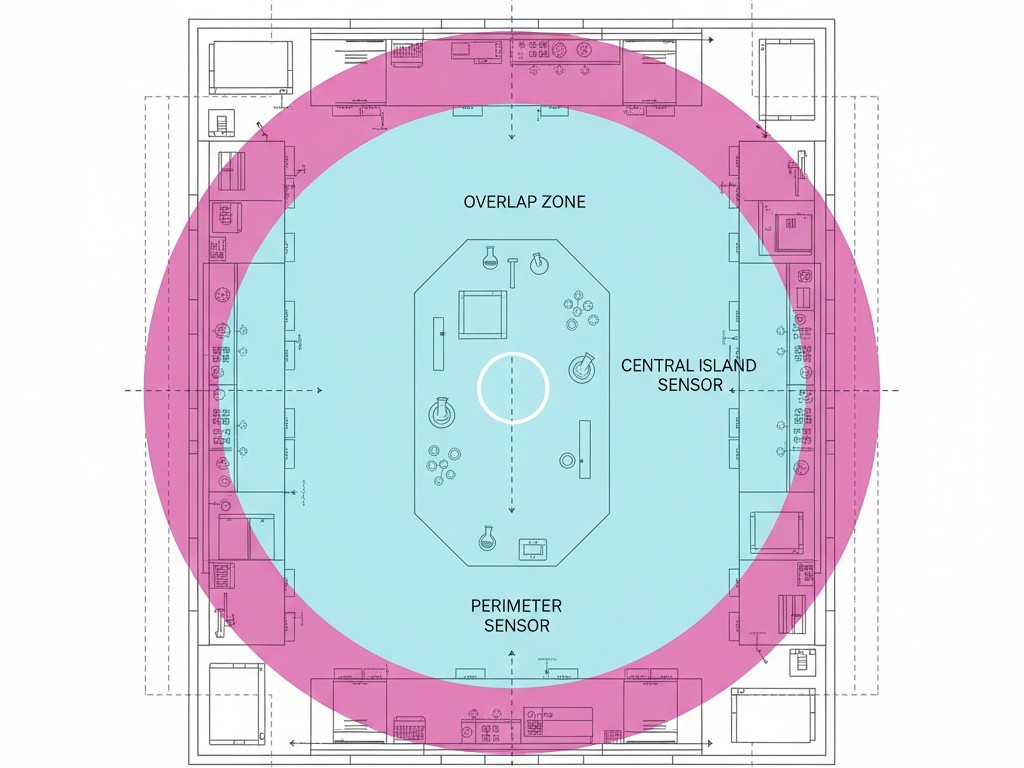
Science labs, art studios, and workshops present the most complex mounting challenges. Lab benches themselves aren’t an issue, but equipment like microscopes and fume hoods can block a sensor’s line of sight. In a lab with a central island, the best sensor position is directly above it. This provides a clear view of the island and reasonable coverage of the perimeter. If students at the perimeter benches work with their backs to the center, a second sensor positioned over that zone may be needed to capture the small-scale hand and arm movements typical of lab work.
您可能也會感興趣

- 電壓:2 粒 AAA 電池
- 日/夜模式
- 延遲時間:15 分鐘、30 分鐘、1 小時(預設)、2 小時

- 吸頂式 PIR 人體感應器,配備乾觸點繼電器輸出
- 12/24VDC 或 12/24VAC 低電壓供電
- 用於 EMS、HVAC 和建築控制輸入的 COM、NO 和 NC 隔離繼電器觸點

- 低壓直流嵌入式天花安裝微波人體感應開關
- 12 VDC / 24 VDC 輸入,支援 10-30 VDC 範圍
- 最大工作電流 10A,配備可調節延時、光感閾值及靈敏度
- 高負載嵌入式天花安裝微波人體感應開關
- 100-265 VAC 市電輸入,10A 型號
- 5.8 GHz 微波感應,配備可調節延時、光感閾值及靈敏度
- 嵌入式天花安裝微波人體感應開關
- 100-265 VAC 市電輸入,5A 型號
- 5.8 GHz 微波感應,配備可調節延時、光感閾值及靈敏度
- 適用於 220V 電源的天花安裝 RZ037 PIR 被動式紅外線佔空感應調光開關
- 最大工作電流 3A,額定負載 660W
- LUX 按鈕控制光線感應器開關及用戶設定之調光亮度
- 適用於 110V 電源的天花安裝 RZ037 PIR 被動式紅外線佔空感應調光開關
- 最大工作電流 3A,額定負載 330W
- LUX 按鈕控制光線感應器開關及用戶設定之調光亮度

- 低壓直流天花安裝微波人體感應開關
- 12 VDC / 24 VDC 輸入,支援 10-30 VDC 範圍
- 最大工作電流 10A,配備可調節延時、光感閾值及靈敏度
- 高負載吸頂式微波動態感應器開關
- 100-265 VAC 市電輸入,10A 型號
- 5.8 GHz 微波感應,配備可調節延時、光感閾值及靈敏度
- 吸頂式微波動態感應器開關
- 100-265 VAC 市電輸入,5A 型號
- 5.8 GHz 微波感應,配備可調節延時、光感閾值及靈敏度

- 低壓直流嵌頂式 PIR 動態感應器開關
- 12 VDC / 24 VDC 輸入,支援 10-30 VDC 範圍
- 最大工作電流 10A,具備可調式時間延遲、光照度閾值及靈敏度

- 高負載嵌頂式 PIR 動態感應器開關
- 100-265 VAC 市電輸入,10A 型號
- 360度偵測,具備可調式時間延遲、光照度閾值及靈敏度
- 嵌頂式 PIR 動態感應器開關
- 100-265 VAC 市電輸入,5A 型號
- 360度偵測,具備可調式時間延遲、光照度閾值及靈敏度

- 用於室內開關照明控制的無線開關及接收器套裝
- 100-230VAC,50/60Hz 接收器,額定電流 5A
- CR2032 電池供電無線開關,採用 2.4GHz 通訊
- 佔用感應(自動開啟/自動關閉)
- 12–24V DC (10–30VDC),最高 10A
- 360° 覆蓋,直徑 8–12 米
- 延遲時間 15 秒至 30 分鐘
- 光感應器 關閉/15/25/35 Lux
- 高/低靈敏度
- 自動開啟/自動關閉佔用模式
- 100–265V AC,10A(需接零線)
- 360° 全方位覆蓋;8–12 米偵測直徑
- 延遲時間 15 秒至 30 分鐘;Lux 關閉/15/25/35;靈敏度 高/低
- 自動開啟/自動關閉佔用模式
- 100–265V AC,5A(需接零線)
- 360° 全方位覆蓋;8–12 米偵測直徑
- 延遲時間 15 秒至 30 分鐘;Lux 關閉/15/25/35;靈敏度 高/低
Timeout Configuration for Lecture and Exam Stability
A sensor’s timeout setting defines how long it holds the lights on after the last detected motion. This is the single most critical variable for classrooms, as the default settings are almost always wrong for educational activities.
The Logic of Extended Hold Times
A typical motion sensor ships with a five- to eight-minute timeout. This is fine for a hallway or restroom, where five minutes of stillness means the room is empty. But in a classroom, thirty students taking a test can be nearly motionless for long stretches. PIR sensors don’t detect presence; they detect change. A still student has a static heat signature. If the entire class sits motionless for six minutes, the sensor has no input to distinguish that from an empty room. The timeout expires, and the lights turn off.
This isn’t a malfunction; it’s a mismatch between the sensor’s logic and the room’s activity. The solution is to extend the timeout beyond the longest plausible period of stillness. For a 90-minute exam, that means setting the sensor to hold the lights for at least 20 minutes after the last motion. This buffer ensures that even an exceptionally still group of test-takers won’t be plunged into darkness.
Recommended Timeout Settings
For general instruction with lectures and group work, a timeout of 10 to 12 minutes provides a comfortable buffer. For any room used for exams, the timeout should be extended to 15 to 20 minutes. This setting prevents disruptions without requiring the proctor to periodically wave their arms.
Start at the high end of the range—20 minutes—and monitor. If lights are frequently found on in empty rooms, the timeout can be incrementally reduced to 18, then 15 minutes, until you find the sweet spot between stability and efficiency. The cost of leaving lights on for an extra five minutes is negligible compared to the disruption of a mid-exam blackout. The configuration must favor stability.
Vacancy Mode: The Solution to Projector Glare
Motion sensors operate in two fundamental modes. Occupancy mode automatically turns lights on when motion is detected and off when the room is vacant. Vacancy mode requires someone to manually flip a switch to turn the lights on, but still automatically turns them off when the room is empty.
For classrooms with projectors, vacancy mode is essential. In occupancy mode, when a teacher manually turns the lights off for a presentation, any subsequent motion will trigger the sensor and turn them right back on, flooding the screen with glare.
Vacancy mode solves this completely. The teacher manually turns lights on at the start of class and off for projector use. The sensor respects that manual “off” command and will not reactivate the lights, no matter how much movement occurs. When everyone leaves, the sensor ensures the lights are turned off if they were left on. This aligns the automation with the teacher’s workflow, preserving intentional control while still saving energy. Rayzeek sensors can be easily set to vacancy mode with a simple switch during installation, requiring no extra wiring.
正在尋找動態感應節能解決方案?
歡迎聯絡我們以獲取完整的 PIR 動態感應器、動態感應節能產品、動態感應器開關以及人體感應/無人感應商業解決方案。
A Foundation for District-Wide Success
The configuration decisions in this playbook—coverage mapping, extended timeouts, and vacancy mode—are the foundation for deploying sensors at scale with confidence. A standardized approach ensures that automation behaves predictably from one school to the next. Teachers know what to expect, exams proceed without interruption, and facilities managers aren’t burdened with complaints and callbacks.
A successful district-wide rollout is built on three principles:
- Consistency: Apply the same settings—central mounting, 20-minute timeouts, and vacancy mode for projector rooms—to every standard classroom.
- Simplicity: Rayzeek sensors are drop-in replacements that work with standard fixtures and switches, minimizing installation costs and maintenance complexity.
- Trust: When technology works invisibly and reliably, it earns trust. Teachers trust the lights won’t disrupt their lessons. Administrators trust that exam integrity is secure.
This trust isn’t a byproduct of the hardware itself, but of a thoughtful configuration tailored to the realities of the classroom.







