
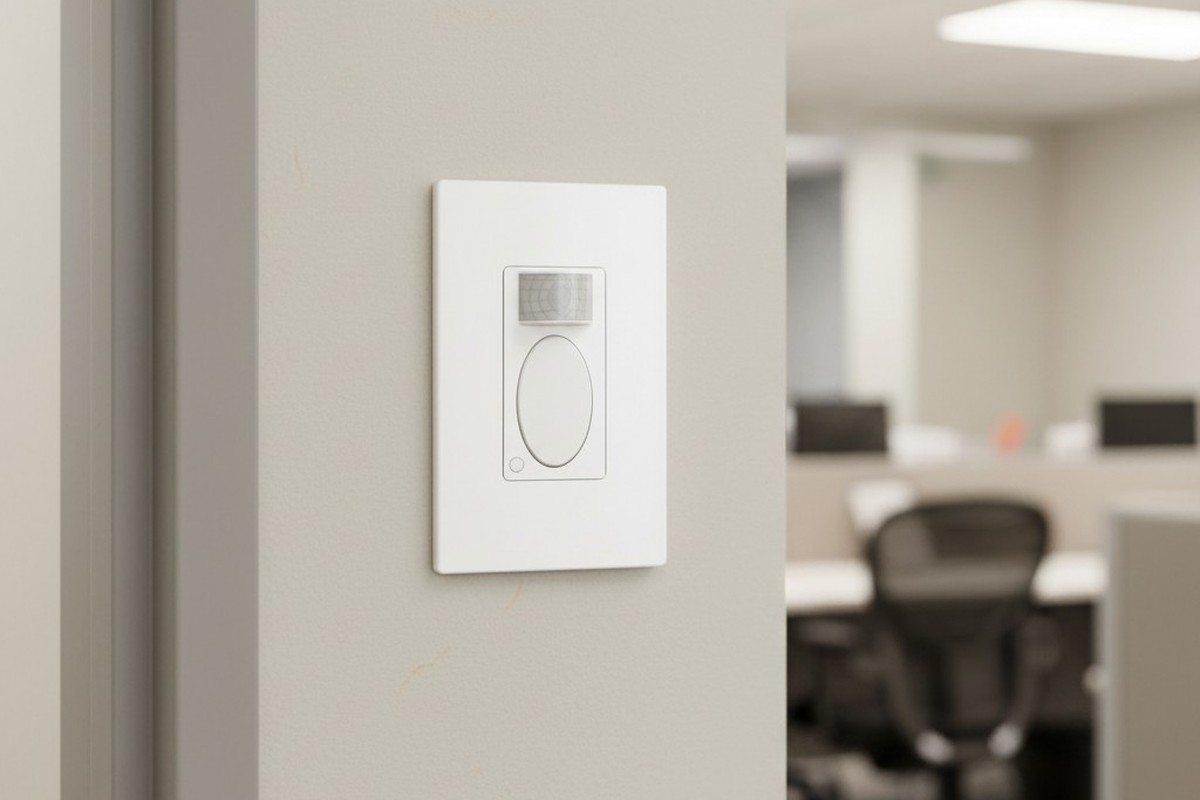
Walk past the copy alcove of any mid-sized office building around 2:00 PM, and you’ll likely witness a peculiar ritual. A staff member, standing perfectly still while the large Canon ImageRunner collates a hundred-page brief, is suddenly plunged into darkness. What follows is the “Waving Man” dance: a frantic flapping of arms above the head to convince the room that a human being is still present. It is a scene of low-stakes humiliation that plays out in law firms, medical billing centers, and university admin blocks every single day.
The frustration isn’t just the darkness; it’s that the machine fails to recognize the work being done. The staff member hasn’t left—they’ve simply stopped moving laterally. In facility management, this is a failure of configuration, not hardware. The sensor installed on the wall (likely a standard Rayzeek RZ021 or similar PIR unit) is doing exactly what the factory told it to do. The problem is that the factory assumes you are walking down a hallway, not reading a document while a machine hums beside you.
Why The Sensor Thinks You Are Gone
To fix the problem, you first have to understand what that little plastic lens is actually looking for. Passive Infrared sensors do not “see” people in the way a camera does. They detect rapid changes in heat signatures moving across invisible zones. The white plastic cover on the front of the switch is a Fresnel lens, which breaks the room’s view into fan-shaped segments. When a warm object (you) crosses the line between one segment and another, the sensor trips the relay and keeps the lights on.
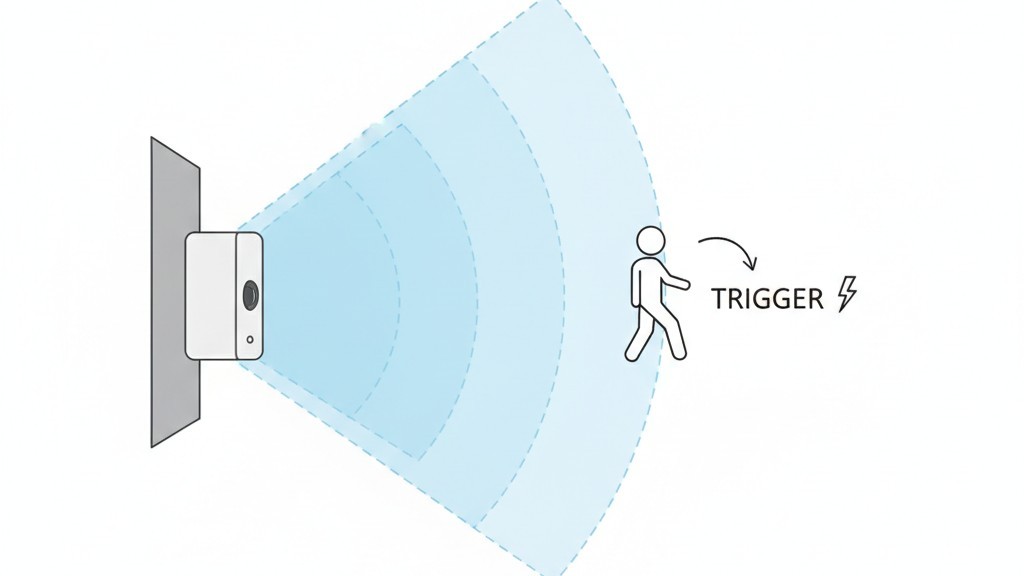
This physics creates a massive blindspot for stationary tasks. When someone stands at a copier, a shredder, or a coffee station, they usually move their hands within a very small radius. They aren’t walking across the room. To the sensor, which scans for gross motor movement across its lens segments, a person standing still to read a collated report is indistinguishable from an empty room.
This issue gets worse if the sensor is installed near an HVAC supply vent. If the heat kicks on and blows warm air across the sensor’s field of view, it can create false triggers—ghosts in the machine. This usually leads installers to dial down the sensitivity to compensate. That lowered sensitivity is exactly what leaves the admin assistant in the dark.
The Hardware Reality: It’s Not Broken, It’s Just Untuned
The default reaction from most office managers is to assume the switch is broken or “cheap.” They might even go online to look for a “better” brand, assuming a more expensive Lutron or Wattstopper unit will magically know they are reading a paper. But the Rayzeek RZ021 units commonly found in these retrofits are perfectly capable of handling a copy room if they are parented correctly. The issue is almost always that the device is still running on its factory default settings, which are optimized for a showroom demo, not real life.
Fixing this does not require an app, a hub, or a Wi-Fi connection. It requires a 2mm flathead screwdriver—often called a jeweler’s driver—and the willingness to pop a faceplate. Underneath the sleek exterior of the RZ021, hidden beneath the plastic toggle button, is a control panel of tiny trimpots (trimmer potentiometers). These are physical dials that change the resistance in the circuit. There is no software here to glitch out; there is only a mechanical setting that needs to be physically turned.
A note on the model variants: Before you start prying at the wall, ensure you aren’t fighting a “Vacancy” sensor. The industry distinguishes between Occupancy sensors (Auto-ON/Auto-OFF) and Vacancy sensors (Manual-ON/Auto-OFF). If you have to press the button to turn the lights on when you enter, but they turn off automatically, you have a Vacancy model (often denoted with a ‘VS’ in the model number). No amount of dial turning will make that switch turn on automatically when you walk in. That is a hardware choice.
Rayzeek 모션 센서 포트폴리오에서 영감을 얻어보세요.
원하시는 제품을 찾지 못하셨나요? 걱정하지 마세요. 문제를 해결할 수 있는 대체 방법은 언제나 존재합니다. 당사의 포트폴리오 중 하나가 도움이 될 수 있습니다.
Configuration: The Mandatory “Max” Setting
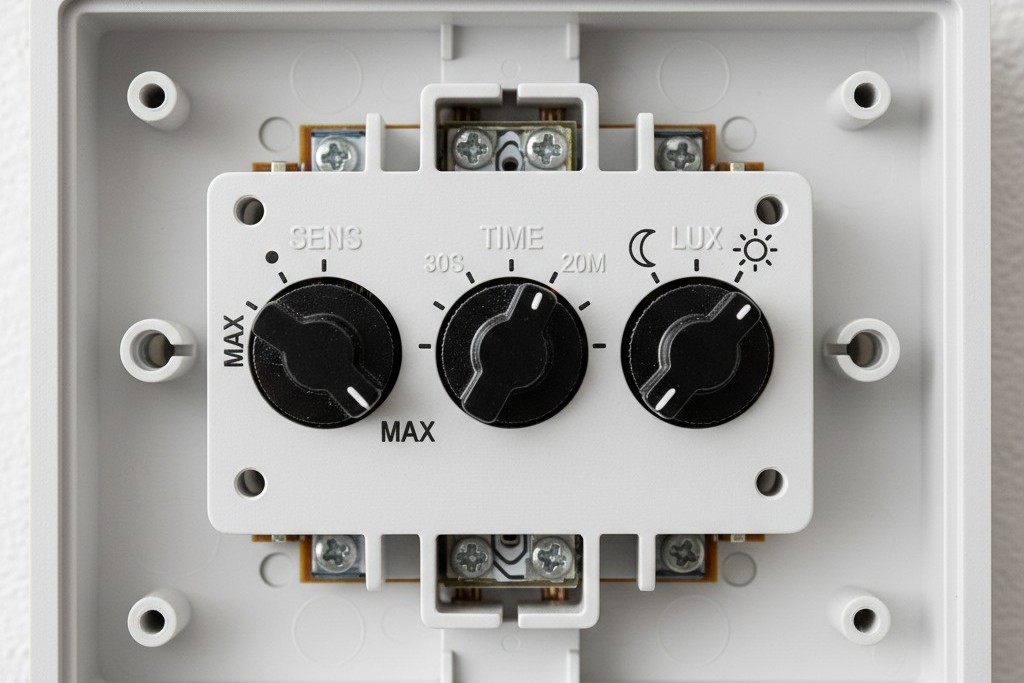
The actual fix is tactile. After removing the wall plate (carefully, as the plastic tabs on generic plates snap if you look at them wrong), you will see three small dials typically labeled Time, Light (or Lux), and Sens (Sensitivity). The factory usually ships these centered or set to “Test” mode. For a copy room, a break room, or any space where people linger, the “Sens” dial is the most critical.
You must turn the Sensitivity dial to its absolute maximum. On the Rayzeek units, this is usually fully clockwise. Do not worry about “false positives” from the hallway; in a small enclosed room, you need the sensor to detect the minor hand movements of someone stapling a document. If the dial is set to medium, it requires a full body walk to trigger. At maximum, it has a fighting chance of seeing a hand wave or a shift in weight.
The second adjustment is the Time Delay. The factory default is often 5 minutes, or sometimes even 15 seconds for test mode. This is the “Energy Star” setting, designed to look good on a spec sheet. In the real world, 5 minutes is aggressive to the point of hostility. A large print job on a Xerox AltaLink can take 12 minutes to spool and finish. If the user stands there reading their phone while it prints, the lights will die twice during the job. The dial is analog, so there is no digital readout, but you want to aim the arrow for the 20-minute mark (usually about 75% of the rotation). If the dial feels imprecise, err on the side of longer.
관심 있는 다른 제품

- 전압: AAA 배터리 2개
- 주간/야간 모드
- 시간 지연: 15분, 30분, 1시간(기본값), 2시간

- 무전압 접점 리레이 출력을 갖춘 천장 설치형 PIR 재실 감지 센서
- 12/24VDC 또는 12/24VAC 저전압 전원 공급
- EMS, HVAC 및 빌딩 제어 입력을 위한 COM, NO 및 NC 절연 리레이 접점

- 저전압 DC 매립형 천장 설치형 마이크로웨이브 모션 센서 스위치
- 10-30 VDC 범위를 지원하는 12 VDC / 24 VDC 입력
- 조절 가능한 지연 시간, Lux 임계값 및 감도 기능을 갖춘 최대 10A 동작 전류
- 고부하용 매립형 천장 설치형 마이크로웨이브 모션 센서 스위치
- 100-265 VAC 라인 전압 입력, 10A 모델
- 조절 가능한 지연 시간, Lux 임계값 및 감도를 갖춘 5.8 GHz 마이크로웨이브 감지
- 천장 매립형 마이크로웨이브 동작 감지 센서 스위치
- 100-265 VAC 라인 전압 입력, 5A 모델
- 조절 가능한 지연 시간, Lux 임계값 및 감도를 갖춘 5.8 GHz 마이크로웨이브 감지
- 220V 전원용 천장 부착형 RZ037 PIR 재실 감지 센서 디머
- 660W 정격 부하 및 최대 동작 전류 3A
- LUX 버튼으로 조도 센서 ON/OFF 및 사용자 설정 디밍 밝기 제어
- 110V 전원용 천장 부착형 RZ037 PIR 재실 감지 디머 스위치
- 330W 정격 부하 및 최대 동작 전류 3A
- LUX 버튼으로 조도 센서 ON/OFF 및 사용자 설정 디밍 밝기 제어

- 저전압 DC 천장 부착형 마이크로웨이브 동작 감지 센서 스위치
- 10-30 VDC 범위를 지원하는 12 VDC / 24 VDC 입력
- 조절 가능한 지연 시간, Lux 임계값 및 감도 기능을 갖춘 최대 10A 동작 전류
- 고부하용 천장 부착형 마이크로웨이브 동작 감지 센서 스위치
- 100-265 VAC 라인 전압 입력, 10A 모델
- 조절 가능한 지연 시간, Lux 임계값 및 감도를 갖춘 5.8 GHz 마이크로웨이브 감지
- 천장 부착형 마이크로웨이브 동작 감지 센서 스위치
- 100-265 VAC 라인 전압 입력, 5A 모델
- 조절 가능한 지연 시간, Lux 임계값 및 감도를 갖춘 5.8 GHz 마이크로웨이브 감지

- 저전압 DC 매립형 천장 PIR 동작 감지 센서 스위치
- 10-30 VDC 범위를 지원하는 12 VDC / 24 VDC 입력
- 시간 지연, 조도 임계값, 감도 조절이 가능한 최대 동작 전류 10A 제품

- 고부하용 매립형 천장 PIR 동작 감지 센서 스위치
- 100-265 VAC 라인 전압 입력, 10A 모델
- 시간 지연, 조도 임계값, 감도 조절이 가능한 360도 감지
- 매립형 천장 PIR 동작 감지 센서 스위치
- 100-265 VAC 라인 전압 입력, 5A 모델
- 시간 지연, 조도 임계값, 감도 조절이 가능한 360도 감지

- 실내 ON/OFF 조명 제어용 무선 스위치 및 수신기 키트
- 정격 전류 5A의 100-230VAC, 50/60Hz 수신기
- 2.4GHz 통신 방식의 CR2032 배터리 구동 무선 스위치
- 재실 모드(자동 ON/자동 OFF)
- 12–24V DC (10–30VDC), 최대 10A
- 360° 감지 범주, 직경 8–12m
- 시간 지연 15초–30분
- 조도 센서 Off/15/25/35 Lux
- 높음/낮음 감도
- 자동 ON/자동 OFF 재실 모드
- 100–265V AC, 10A (중성선 필요)
- 360° 감지 범위; 감지 직경 8–12m
- 시간 지연 15초–30분; 조도 OFF/15/25/35; 감도 높음/낮음
- 자동 ON/자동 OFF 재실 모드
- 100–265V AC, 5A (중성선 필요)
- 360° 감지 범위; 감지 직경 8–12m
- 시간 지연 15초–30분; 조도 OFF/15/25/35; 감도 높음/낮음
The False Economy of the 5-Minute Timer
Expect pushback on this. A facilities director or a sustainability-minded owner might argue that setting the timer to 20 minutes “wastes energy.” They envision the lights burning for 15 minutes after someone leaves, spinning the meter and costing a fortune. This is what we call “Phantom Savings.” It is a theoretical efficiency that ignores the operational reality of the building.
Let’s look at the math. A standard copy room might have two or three LED troffers. In the old days of 400-watt metal halide or T12 fluorescents, leaving them on was costly. Today, an LED fixture might pull 40 watts. Extending the timeout from 5 minutes to 20 minutes means the light stays on for an extra 15 minutes per cycle. At $0.12 per kWh, that extra quarter-hour of light costs fractions of a penny.
Compare that fraction of a penny to the cost of a Senior Partner or a specialized technician losing their train of thought because the room went black. The labor cost of the interruption exceeds the annual energy savings of the aggressive timeout in a single instance. We are not trying to heat a warehouse here; we are keeping a 10×10 room lit for a human being. Reliability is the ultimate efficiency. If the staff puts duct tape over the sensor because it annoys them—which happens more often than code inspectors admit—you have saved zero energy. Set the dial to 20 minutes, turn the sensitivity to high, and let the sensor do its job quietly.







