

You know the scene. You’re in a high-stakes meeting in a “fishbowl”—one of those modern, floor-to-ceiling glass conference rooms architects love and engineers tolerate. The discussion heats up. Then, the lights die. Someone has to wave their arms like a drowning sailor to bring them back.
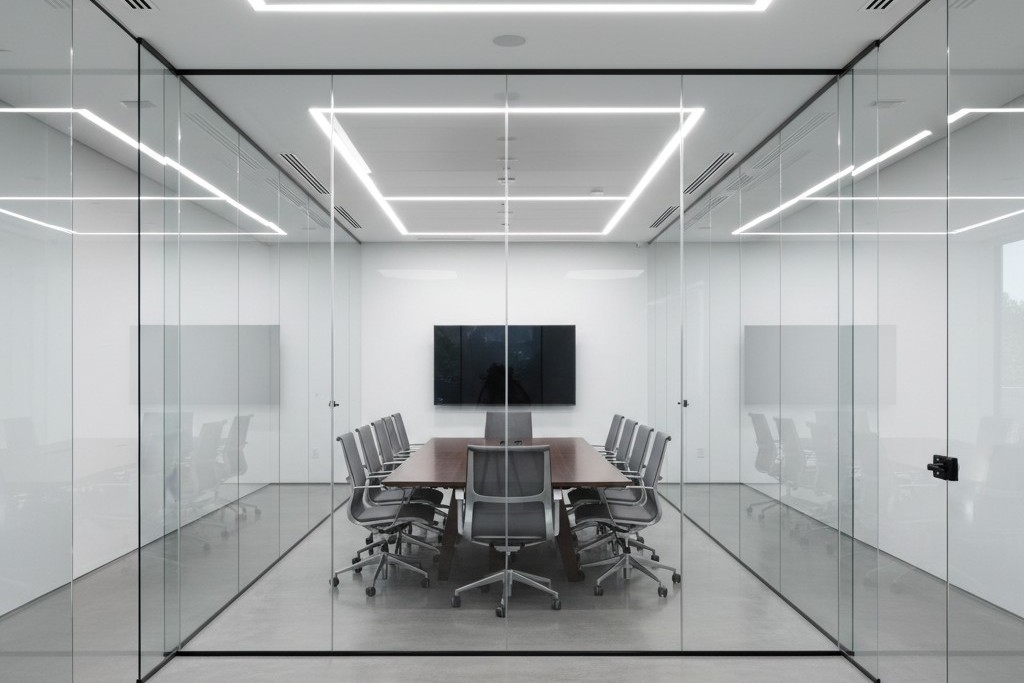
Worse, the room sits empty. Yet every time someone walks down the hallway to get a coffee, the lights inside the glass box blaze to life. The sensor detects a passerby and decides, incorrectly, that the party is in the conference room. This is “ghost switching,” and in the era of open-plan glass offices, it’s an epidemic.
The facility manager usually blames the sensor brand. The client blames the electrician. But it’s rarely broken hardware. The problem is that standard motion detection physics breaks down when you surround a room with invisible walls. You cannot simply install a sensor in a glass box the same way you install one in a drywall closet and expect it to behave.
The Physics of Invisibility
To fix this, you have to understand what the sensor is actually seeing. Most commercial sensors use one of two technologies, or a combination of both (Dual-Technology). Neither of them understands glass.
Infrarrojo pasivo (PIR) is the bedrock of motion sensing. It looks for heat differentials moving across a segmented field of view—specifically, the infrared energy of a human body moving against background walls. Glass is interesting because, to IR, it is opaque. Generally, a PIR sensor cannot “see” heat through glass. If you stand outside a window and wave at a PIR sensor, it shouldn’t trigger. Modern office glass comes in many grades, though. Thin, single-pane architectural glass can heat up when a warm body passes close to it, or allow just enough IR leakage through gaps in the doorframe to trigger a sensitive unit.
Ultrasonic technology is usually the villain here. This is the “Dual” in Dual-Tech sensors (like the Wattstopper DT series or similar units from Leviton). These sensors emit a high-frequency sound wave (often around 32kHz or 40kHz) and listen for the Doppler shift caused by movement.
Ultrasonic waves don’t respect glass the way IR does. They treat the room like a pressurized volume of air. If the glass wall vibrates because a heavy cart rolls down the hallway, the sensor hears it. If there is a one-inch air gap under the glass door, the ultrasonic waves pour out into the hallway like water. When someone walks by, they disturb that wave pattern. The sensor, sitting faithfully in the ceiling, detects a frequency shift and fires the relay. It thinks the movement is inside the room because the “room” effectively leaked into the corridor.
Don’t be tempted to solve this with app-based consumer smart bulbs, by the way. Mesh networks aren’t designed for the heavy interference of a commercial ceiling, and putting a battery-powered toy in a maintenance-heavy environment is a recipe for failure. Stick to hard-wired controls.
Geometry: The Rookie Mistake
The second point of failure is geometric. In a standard drywall room, installers are trained to put the sensor in the corner or near the door, looking into the room. This ensures that as soon as you walk in, you cross the beam.
In a glass room, this is fatal. If you place a wall-switch sensor (like a Lutron Maestro or Leviton OSSMT) next to the glass door, it is almost certainly facing the glass wall opposite it—or worse, looking diagonally out through the clear glass front of the room. Even if the glass blocks IR, the sensor’s peripheral vision is wide (often 180 degrees). It catches the heat signature of people walking past the door gap.
The fix requires moving the device, which might mean opening the wall—an annoyance that pays for itself in reduced complaints. Mount the sensor on the header wall (the same wall the door is on), facing inward toward the back of the room. By positioning the sensor so its “back” is to the hallway, you physically prevent it from seeing the traffic outside. It can only see the people actually at the conference table.
¿Busca soluciones de ahorro de energía activadas por movimiento?
Póngase en contacto con nosotros para obtener sensores de movimiento PIR completos, productos de ahorro de energía activados por movimiento, interruptores con sensor de movimiento y soluciones comerciales de presencia/vacancia.
If your lighting controls are integrated with the HVAC system—meaning the lights tell the VAV box to increase airflow—this placement is critical. A sensor that triggers on hallway traffic will ramp up the AC in an empty room, wasting energy. Just ensure the new position doesn’t block the sensor’s view of the thermostat, or you’ll trade lighting complaints for temperature complaints.
The Tape Trick and Sensitivity
Sometimes you can’t move the box. The conduit is set, the drywall is painted, and the client is screaming. This is where you need to stop acting like a programmer and start acting like a mechanic.
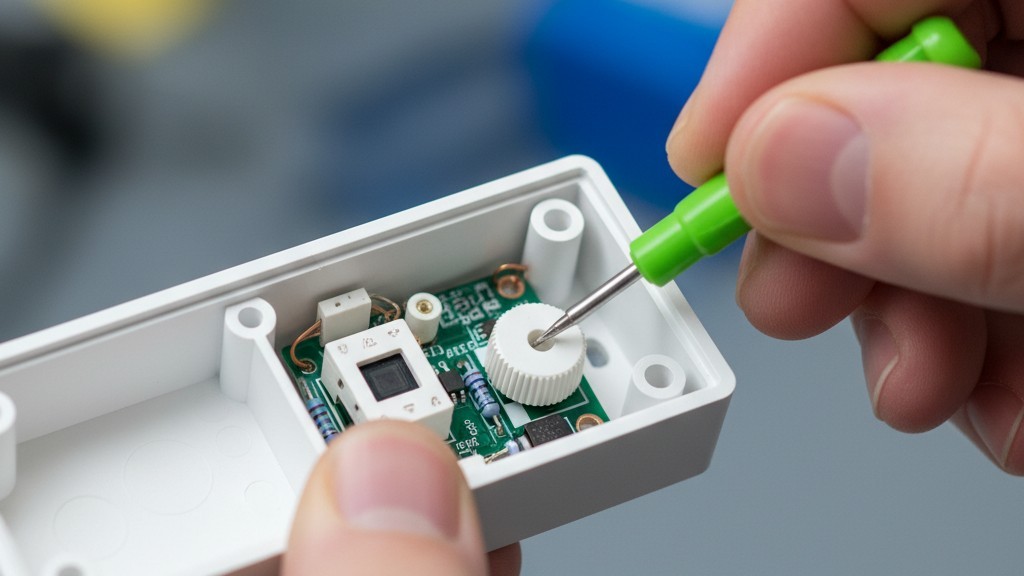
Open the sensor box. Don’t throw away the little plastic bag of accessories. Inside, you will often find small, opaque stickers or plastic inserts. These are masking labels, the most effective, under-utilized tool in the lighting industry.
Inspírese con los portafolios de sensores de movimiento Rayzeek.
¿No encuentra lo que busca? No se preocupe. Siempre existen formas alternativas de resolver sus problemas. Quizá alguno de nuestros portafolios pueda ayudarle.
If your sensor is picking up hallway traffic on the left side, apply the masking tape over the left segments of the Fresnel lens. You are physically blinding the sensor to that specific angle. It’s crude, it looks low-tech, and it works perfectly. A piece of foil tape costs nothing but solves problems that hours of sensitivity tuning cannot.
Speaking of tuning: check the trimpots (the small dials) under the faceplate. You will likely need a small green screwdriver. Factory defaults often have both PIR and Ultrasonic sensitivity set to roughly 75–100%. In a glass room, you must turn the Ultrasonic sensitivity down. Way down. Drop it to 20% or 30%. You want it sensitive enough to pick up someone typing at the table, but deaf to the vibration of the glass wall. If the sensor has a “Microphonics” setting (common in Acuity brands), turn that off entirely. It listens for noise, and glass rooms are acoustically reflective echo chambers.
The Logic Fix: Manual On
If you change only one setting, make it this: Change the operating mode from “Occupancy” to “Vacancy.”
“Occupancy Mode” is Auto-On / Auto-Off. You walk in, lights turn on. You leave, lights turn off. This is the default for most installs, and it is the source of the “ghost switching” madness. Every false trigger turns the lights on.
“Vacancy Mode” is Manual-On / Auto-Off. You walk into the room and you must press the button to turn the lights on. When you leave, the sensor watches for emptiness and turns them off automatically.
This simple logic change eliminates 100% of false-on triggers. If a ghost walks by the hallway, the sensor might “see” it, but since the logic requires a physical button press to start the cycle, the lights stay dark. The room remains dignified and empty.
There is a moral argument here, too. In a glass-walled room, “Auto-On” is a nuisance. It assumes intent where there is none. Manual-On forces intent. It complies with strict energy codes like California’s Title 24, and it stops the building from looking like a disco at night.
(You might worry people will complain about having to touch a switch. In practice, the complaint volume for “I had to push a button” is near zero compared to “The lights keep turning on and scaring me.”)
The Timeout Economy
Finally, address the “waving arms” problem. This usually happens because the “Timeout” setting—the delay before lights cut out—is set aggressively low.
Quizás le interese

- Tensión: 2 pilas AAA
- Modo Día/Noche
- Temporización: 15 min, 30 min, 1 h (por defecto), 2 h

- Sensor de presencia PIR para montaje en techo con salida de relé de contacto seco
- Alimentación de baja tensión de 12/24VDC o 12/24VAC
- Contactos de relé aislados COM, NO y NC para entradas de EMS, HVAC y control de edificios

- Interruptor con sensor de movimiento por microondas empotrable en techo de baja tensión DC
- Entrada de 12 VDC / 24 VDC con rango de 10-30 VDC
- Corriente de funcionamiento máxima de 10A con retardo de tiempo, umbral de Lux y sensibilidad ajustables
- Interruptor con sensor de movimiento por microondas empotrable en techo para cargas más elevadas
- Entrada de tensión de red de 100-265 VAC, modelo de 10A
- Detección por microondas de 5,8 GHz con temporizador, umbral Lux y sensibilidad ajustables
- Interruptor con sensor de movimiento por microondas empotrable para techo
- Entrada de tensión de red de 100-265 VAC, modelo de 5A
- Detección por microondas de 5,8 GHz con temporizador, umbral Lux y sensibilidad ajustables
- Regulador con sensor de presencia PIR RZ037 de techo para alimentación de 220V
- Corriente de funcionamiento máxima de 3A con carga nominal de 660W
- El botón LUX controla el encendido/apagado del sensor de luz y la regulación de brillo ajustada por el usuario
- Regulador con sensor de presencia PIR RZ037 de techo para alimentación de 110V
- Corriente de funcionamiento máxima de 3A con carga nominal de 330W
- El botón LUX controla el encendido/apagado del sensor de luz y la regulación de brillo ajustada por el usuario

- Interruptor con sensor de movimiento por microondas de techo para CC de bajo voltaje
- Entrada de 12 VDC / 24 VDC con rango de 10-30 VDC
- Corriente de funcionamiento máxima de 10A con retardo de tiempo, umbral de Lux y sensibilidad ajustables
- Interruptor con sensor de movimiento por microondas de techo para mayor carga
- Entrada de tensión de red de 100-265 VAC, modelo de 10A
- Detección por microondas de 5,8 GHz con temporizador, umbral Lux y sensibilidad ajustables
- Interruptor con sensor de movimiento por microondas de techo
- Entrada de tensión de red de 100-265 VAC, modelo de 5A
- Detección por microondas de 5,8 GHz con temporizador, umbral Lux y sensibilidad ajustables

- Interruptor con sensor de movimiento PIR para montaje empotrable en techo de CC de bajo voltaje
- Entrada de 12 VDC / 24 VDC con rango de 10-30 VDC
- Corriente máxima de trabajo de 10 A con tiempo de retardo, umbral de luxes y sensibilidad ajustables

- Interruptor con sensor de movimiento PIR empotrable en techo para mayor carga
- Entrada de tensión de red de 100-265 VAC, modelo de 10A
- Detección de 360 grados con tiempo de retardo, umbral de luxes y sensibilidad ajustables
- Interruptor con sensor de movimiento PIR empotrable en techo
- Entrada de tensión de red de 100-265 VAC, modelo de 5A
- Detección de 360 grados con tiempo de retardo, umbral de luxes y sensibilidad ajustables

- Kit de emisor inalámbrico y receptor para el control de iluminación de encendido/apagado en interiores
- Receptor de 100-230 V CA, 50/60 Hz con corriente nominal de 5 A
- Interruptor inalámbrico alimentado por CR2032 con comunicación de 2,4 GHz
- Presencia (encendido automático/apagado automático)
- 12–24 V CC (10–30 V CC), hasta 10 A
- Cobertura de 360°, 8–12 m de diámetro
- Tiempo de retardo de 15 s a 30 min
- Sensor de luz Desactivado/15/25/35 Lux
- Sensibilidad alta/baja
- Modo de presencia con encendido/apagado automático
- 100–265V CA, 10A (requiere neutro)
- Cobertura de 360°; diámetro de detección de 8–12 m
- Temporización: 15 s–30 min; Lux OFF/15/25/35; Sensibilidad Alta/Baja
- Modo de presencia con encendido/apagado automático
- 100–265V CA, 5A (requiere neutro)
- Cobertura de 360°; diámetro de detección de 8–12 m
- Temporización: 15 s–30 min; Lux OFF/15/25/35; Sensibilidad Alta/Baja
Green building initiatives often push for 5-minute timeouts. In a conference room, this is aggressive stupidity. People sit still in meetings. They read slides. They listen to a speaker. If the sensor is set to 5 minutes, the lights will cut out during every thoughtful pause.
Set the timeout to a minimum of 15 minutes. 20 is better.
The math supports this. Consider a room with 40W of LED lighting. The cost to run those lights for an extra 10 minutes is a fraction of a penny. Now calculate the cost of interrupting a meeting with six executives who bill at $200 an hour. The distraction cost of the “waving arms dance” vastly outweighs the energy savings of a short timeout.
Checklist: The Glass Room Protocol
When the client calls about the haunted conference room, don’t just swap the sensor. Follow this order of operations:
- Check the Mode: Switch to Vacancy (Manual-On / Auto-Off). This fixes 90% of hallway triggers instantly.
- Mask the Lens: Use foil tape or blinders to block the view of the door and glass.
- Dial Down Ultrasonic: Reduce sensitivity to <30% to stop it from hearing the glass vibrate.
- Extend Timeout: Set to 15 minutes minimum to prevent false-offs during meetings.
- Relocate (Last Resort): If all else fails, move the sensor to the header wall facing inward.
The glass office is here to stay. Your sensors need to adapt to it, not the other way around.







