
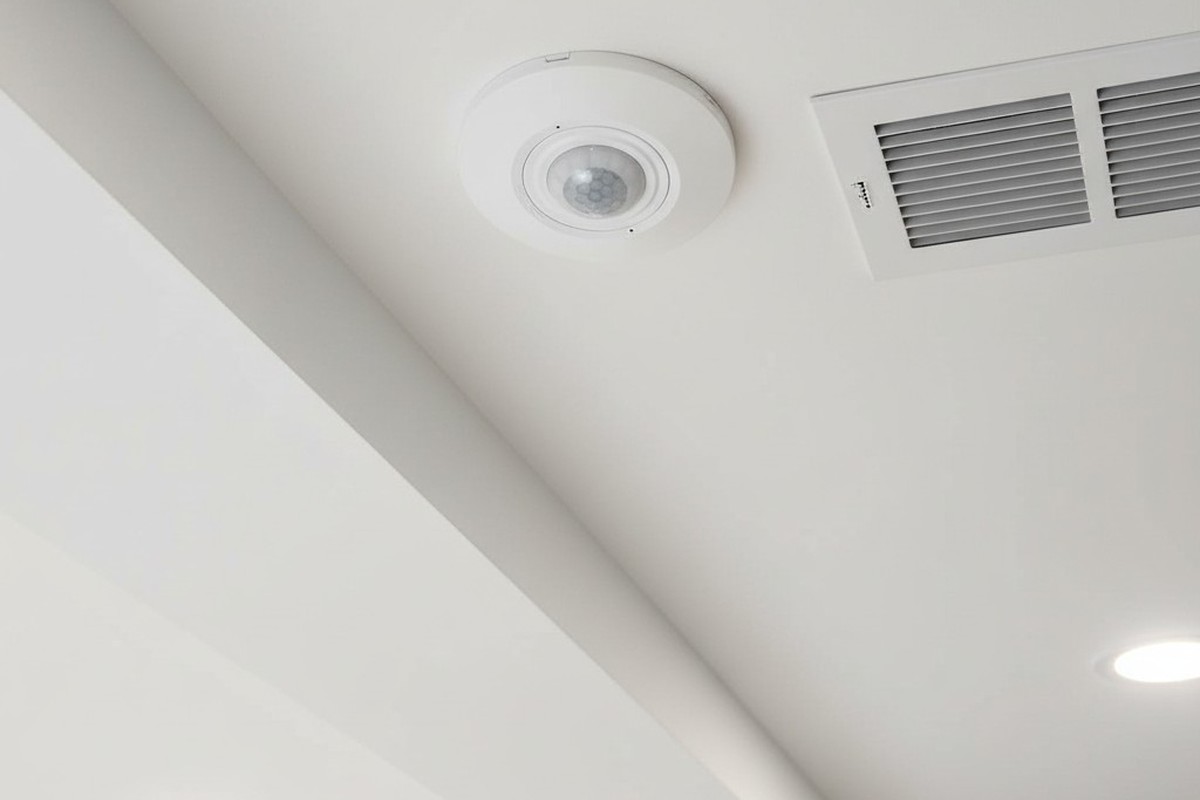
The most common mistake in basement finishing happens long before the drywall goes up. It happens on the 2D floor plan. A homeowner or general contractor looks at a large, rectangular recreation room and instinctively places a switch by the stair landing and another by the utility door. On paper, this looks like standard code compliance. In reality, it’s a recipe for frustration.
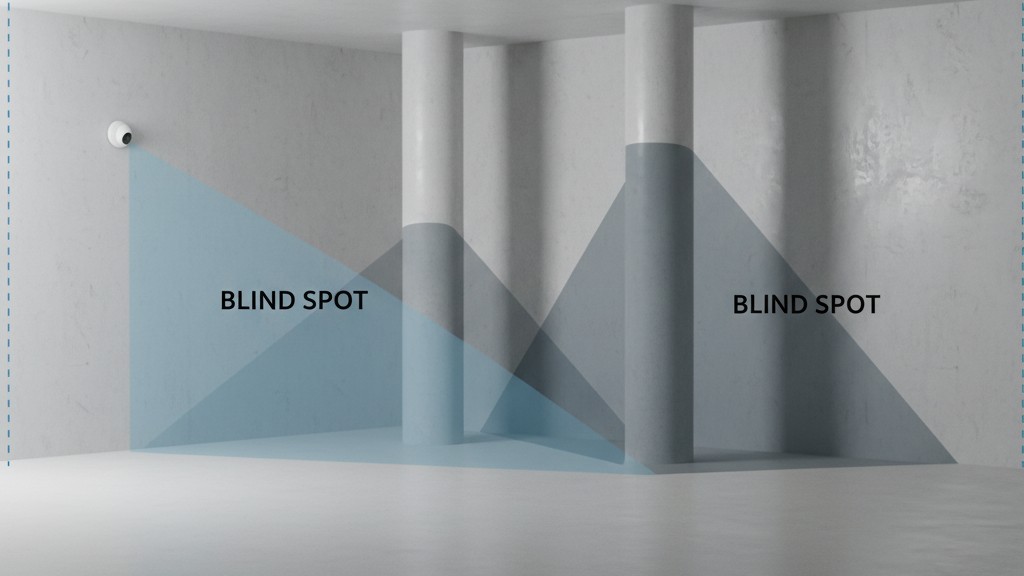
Basements aren’t bedrooms; they are interrupted spaces defined by structural necessities like lally columns, HVAC trunk lines, and support beams. When you place a standard PIR (Passive Infrared) switch on a wall in a room punctuated by 12-inch steel columns wrapped in drywall, you create “shadow cones”—wedges of invisibility where the sensor cannot see.
Take the pool table scenario. A homeowner installs a slate table in the center of the room, flanked by two structural pillars. The lighting control is a high-end motion switch on the wall near the stairs. The homeowner walks down, the lights snap on—success. But then they rack the balls and move to the far side of the table to take a shot. That position places a pillar directly between them and the wall switch. The sensor, blinded by the column, assumes the room is empty. In the middle of a backswing, the room plunges into darkness.
The sensor’s electronics aren’t the problem. The geometry is. A wall-mounted sensor looks out across a flat plane, meaning any vertical obstruction cuts its vision in half. Throwing money at more expensive wall switches won’t fix this. You have to stop trying to sense motion from the perimeter.
The Ceiling Advantage
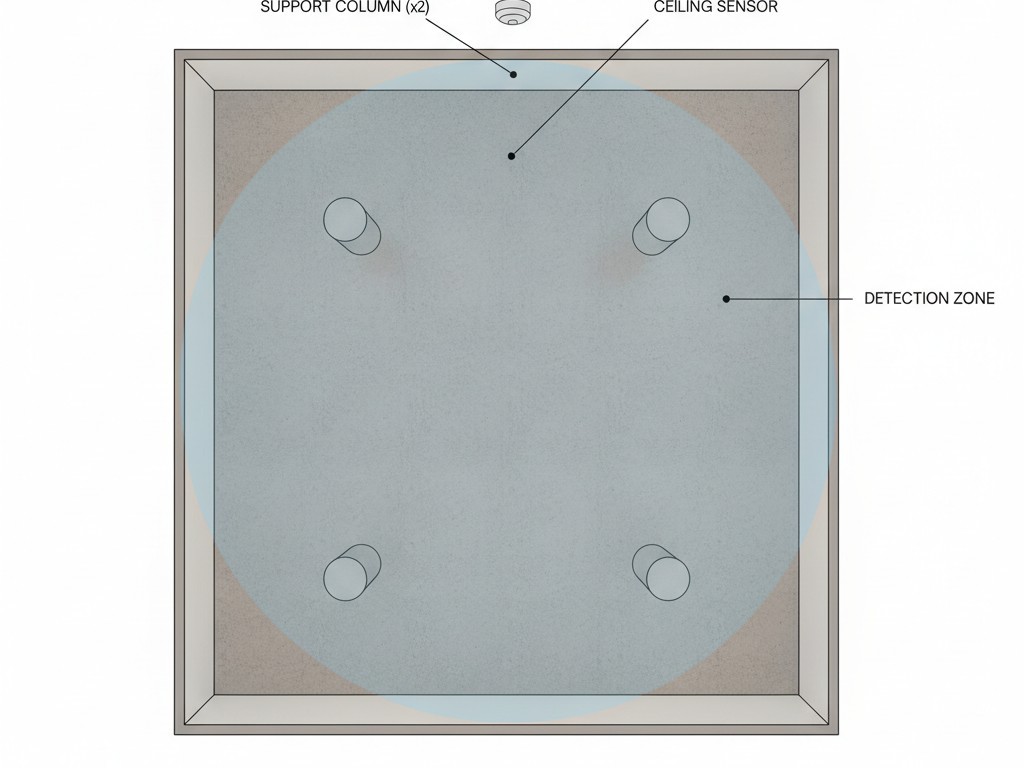
The solution requires a shift in perspective. You must move the “eye” of the system from the wall to the ceiling. In commercial environments, this is standard practice, but residential retrofits often overlook it. A ceiling-mounted sensor, like the Rayzeek RZ022, operates with a 360-degree field of view. By placing the sensor in the geometric center of the room—or specifically between obstructions—you eliminate the blind spots caused by pillars and furniture. The sensor looks down, not across. A pillar that blocks a wall switch is just a small circle from the perspective of a ceiling mount. It sees over the sofa, behind the pool table, and around the structural columns.
This approach also solves the “hands-full” problem. When you enter a basement carrying a laundry basket or a sleeping child, you don’t want to fumble for a toggle or shout commands at a voice assistant. Voice control is active; it requires intent and a free mouth. Motion control should be passive and invisible. A properly placed ceiling sensor detects entry immediately, regardless of which door you came through, and maintains that detection as long as there is movement anywhere in the room. It shifts lighting from a manual task to an environmental response. The goal is for occupants to never touch a switch, and more importantly, never have to wave their arms to keep the lights on.
The Bill of Materials Smackdown
There is a persistent myth that installing ceiling sensors is more complex or expensive than traditional switching. The opposite is often true, particularly in large basements with multiple entry points.
If you were to wire a large rec room manually, you would likely need a 3-way switch at the bottom of the stairs and a 4-way switch at the back door. That involves expensive 14/3 Romex traveler wires running between every switch location, complex wiring diagrams that confuse even seasoned DIYers, and multiple device boxes cut into the walls. It is a lot of copper and labor for a system that still requires you to walk over to a wall to use it.
قد تكون مهتمًا بـ

- الجهد الكهربائي: بطاريتان AAA
- وضع النهار/الليل
- التأخير الزمني: 15 دقيقة، 30 دقيقة، ساعة واحدة (افتراضي)، ساعتان

- مستشعر إشغال PIR للسقف مع مخرج مرحل اتصال جاف
- مصدر إمداد بالطاقة منخفض الجهد 12/24VDC أو 12/24VAC
- ملامسات مرحل معزولة (COM وNO وNC) لمدخلات التحكم في أنظمة إدارة الطاقة (EMS) والتدفئة والتهوية وتكييف الهواء (HVAC) وإدارة المباني

- مفتاح مستشعر الحركة بالموجات الدقيقة بجهد منخفض من التيار المستمر (DC) للتركيب الغاطس في السقف
- دخل 12 VDC / 24 VDC مع نطاق من 10 إلى 30 VDC
- تيار تشغيل أقصى 10A مع تأخير زمني قابل للتعديل، وعتبة إضاءة (Lux)، وحساسية قابلة للضبط
- مفتاح مستشعر الحركة بالموجات الدقيقة للأحمال العالية للتركيب الغاطس في السقف
- دخل جهد الخط 100-265 VAC، طراز 10A
- استشعار بالموجات الدقيقة بتردد 5.8 GHz مع تأخير زمني قابل للتعديل، وعتبة إضاءة (Lux)، وحساسية قابلة للضبط
- مفتاح مستشعر الحركة بالموجات الدقيقة للتركيب الغاطس في السقف
- دخل جهد الخط 100-265 VAC، طراز 5A
- استشعار بالموجات الدقيقة بتردد 5.8 GHz مع تأخير زمني قابل للتعديل، وعتبة إضاءة (Lux)، وحساسية قابلة للضبط
- خافض إضاءة بمستشعر الإشغال RZ037 PIR للتركيب السقفي بقدرة جهد 220V
- تيار تشغيل أقصى 3A مع حمل مقدر يبلغ 660W
- زر LUX للتحكم في تشغيل/إيقاف مستشعر الضوء ومستوى سطوع خفت الإضاءة المحدد من قبل المستخدم
- خافض إضاءة بمستشعر الإشغال RZ037 PIR للتركيب السقفي بقدرة جهد 110V
- تيار تشغيل أقصى 3A مع حمل مقدر يبلغ 330W
- زر LUX للتحكم في تشغيل/إيقاف مستشعر الضوء ومستوى سطوع خفت الإضاءة المحدد من قبل المستخدم

- مفتاح مستشعر حركة ميكروويف لسقف، يعمل بالتيار المستمر منخفض الجهد
- دخل 12 VDC / 24 VDC مع نطاق من 10 إلى 30 VDC
- تيار تشغيل أقصى 10A مع تأخير زمني قابل للتعديل، وعتبة إضاءة (Lux)، وحساسية قابلة للضبط
- مفتاح مستشعر حركة ميكروويف لسقف ذو حمل أعلى
- دخل جهد الخط 100-265 VAC، طراز 10A
- استشعار بالموجات الدقيقة بتردد 5.8 GHz مع تأخير زمني قابل للتعديل، وعتبة إضاءة (Lux)، وحساسية قابلة للضبط
- مفتاح مستشعر حركة ميكروويف لسقف
- دخل جهد الخط 100-265 VAC، طراز 5A
- استشعار بالموجات الدقيقة بتردد 5.8 GHz مع تأخير زمني قابل للتعديل، وعتبة إضاءة (Lux)، وحساسية قابلة للضبط

- مفتاح حساس الحركة للأشعة تحت الحمراء PIR المدمج للسقف يعمل بالتيار المستمر منخفض الجهد
- دخل 12 VDC / 24 VDC مع نطاق من 10 إلى 30 VDC
- أقصى تيار تشغيل 10A مع تأخير زمني قابل للتعديل وعتبة إضاءة (Lux) وحساسية قابلتين للتعديل

- مفتاح حساس الحركة للأشعة تحت الحمراء PIR المدمج للسقف للأحمال العالية
- دخل جهد الخط 100-265 VAC، طراز 10A
- كشف بزاوية 360 درجة مع تأخير زمني قابل للتعديل وعتبة إضاءة (Lux) وحساسية قابلتين للتعديل
- مفتاح حساس الحركة للأشعة تحت الحمراء PIR المدمج للسقف
- دخل جهد الخط 100-265 VAC، طراز 5A
- كشف بزاوية 360 درجة مع تأخير زمني قابل للتعديل وعتبة إضاءة (Lux) وحساسية قابلتين للتعديل

- طقم مفتاح ومستقبل لاسلكي للتحكم في تشغيل وإيقاف الإضاءة الداخلية
- مستقبل 100-230VAC، 50/60Hz بتيار مقدر 5A
- مفتاح لاسلكي يعمل ببطارية CR2032 مع اتصال بتردد 2.4GHz
- مستشعر شغور (تشغيل تلقائي/إيقاف تلقائي)
- 12–24V DC (10–30VDC)، حتى 10A
- تغطية 360 درجة، بقطر 8–12 م
- تأخير زمني من 15 ثانية إلى 30 دقيقة
- مستشعر إضاءة: إيقاف/15/25/35 لوكس
- حساسية عالية/منخفضة
- وضع الشغور بتشغيل تلقائي/إيقاف تلقائي
- 100–265V AC، 10A (يتطلب خط محايد)
- تغطية 360 درجة؛ قطر الكشف 8–12 م
- تأخير زمني من 15 ثانية إلى 30 دقيقة؛ شدة الإضاءة: إيقاف/15/25/35 لوكس؛ الحساسية: عالية/منخفضة
- وضع الشغور بتشغيل تلقائي/إيقاف تلقائي
- 100–265V AC, 5A (neutral required)
- تغطية 360 درجة؛ قطر الكشف 8–12 م
- تأخير زمني من 15 ثانية إلى 30 دقيقة؛ شدة الإضاءة: إيقاف/15/25/35 لوكس؛ الحساسية: عالية/منخفضة
A line-voltage ceiling sensor system simplifies this drastically. You are essentially creating a simple single-pole switch loop. Power goes to the light fixture, and a single switch leg drops down to the sensor (or the sensor sits inline at the fixture box). You eliminate the need for traveler wires entirely. If you have three entrances to the basement, you don’t need three switches. You just need one sensor positioned to see all three entrances.
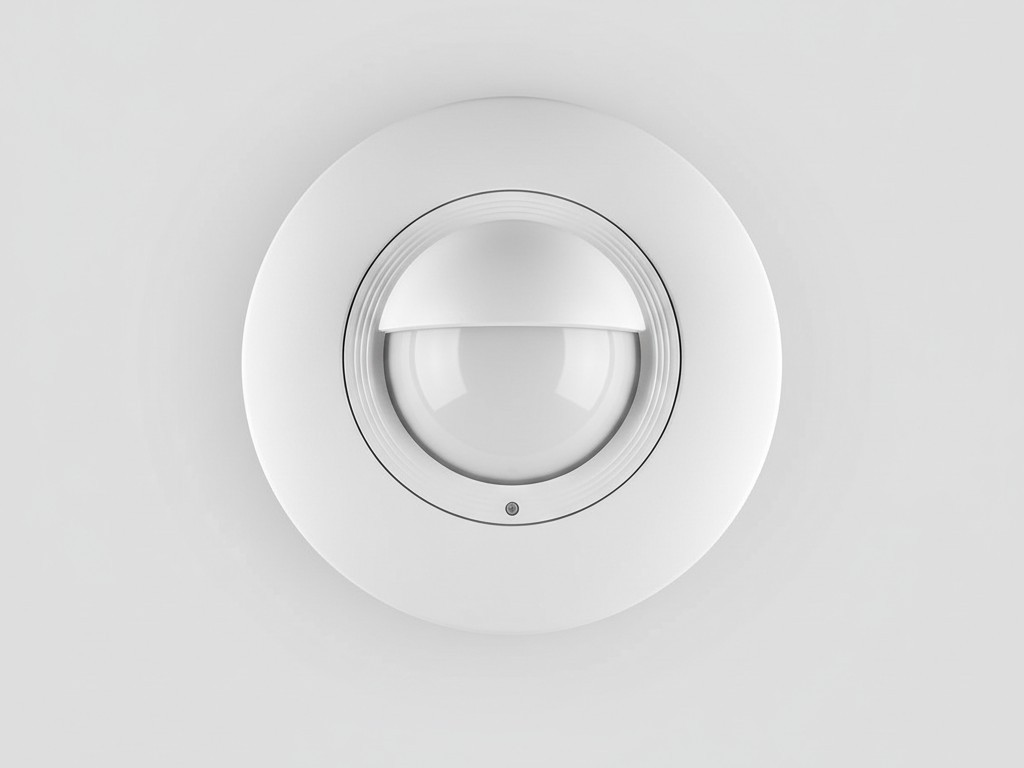
You save on wire, you save on device boxes, and you save the headache of troubleshooting a miswired 4-way circuit. For those worried about “smart home” integration, remember that reliability usually drops as complexity rises. A hardwired line-voltage sensor doesn’t need a hub, doesn’t need a firmware update, and doesn’t drop off the Wi-Fi when the router reboots. It just works, physically closing the circuit when it detects a heat signature.
Strategic Placement and Obstacles
Placement is the one variable you must get right. While specs for sensors like the Rayzeek might claim a detection diameter of 30 feet or more, real-world basement conditions require a conservative approach. Obstacles like dropped HVAC bulkheads or deep joist bays can act as “blinders” if the sensor is mounted too high or in a recessed corner. You cannot simply stick it in the center of the room and hope for the best if a massive duct runs right through the middle.
هل تبحث عن حلول لتوفير الطاقة تعمل بالحركة؟
تواصل معنا للحصول على أجهزة استشعار الحركة PIR بالكامل، والمنتجات الموفرة للطاقة والتي تعمل بالحركة، ومفاتيح أجهزة استشعار الحركة، والحلول التجارية للإشغال/الشاغر.
In a room split by a large bulkhead, your instinct might be to install two separate sensors. However, you can often utilize the obstacle itself. Mounting the sensor directly onto the bottom of the framed bulkhead often gives it a commanding view of both sides of the room. If the room is truly L-shaped or divided by a soundproof wall, you can parallel wire multiple sensors. If Sensor A or Sensor B sees motion, the lights trigger. This is much easier than trying to wire multiple wall switches to control the same zone.
Don’t fall for the battery-powered sensor trap. It is tempting to buy a “stick-on” wireless motion sensor to avoid fishing wire through ceiling joists. This is a short-term win that guarantees long-term annoyance. Batteries die. They inevitably die when you are on vacation, when a guest is staying in the basement, or when you have no replacements in the drawer. A hardwired sensor is a permanent infrastructure upgrade; a battery sensor is a maintenance task waiting to happen. If the walls are open or if you have a drop ceiling, run the 14/2 wire. The reliability of a direct electrical connection is worth the afternoon of fishing cable.
Dialing in the Experience
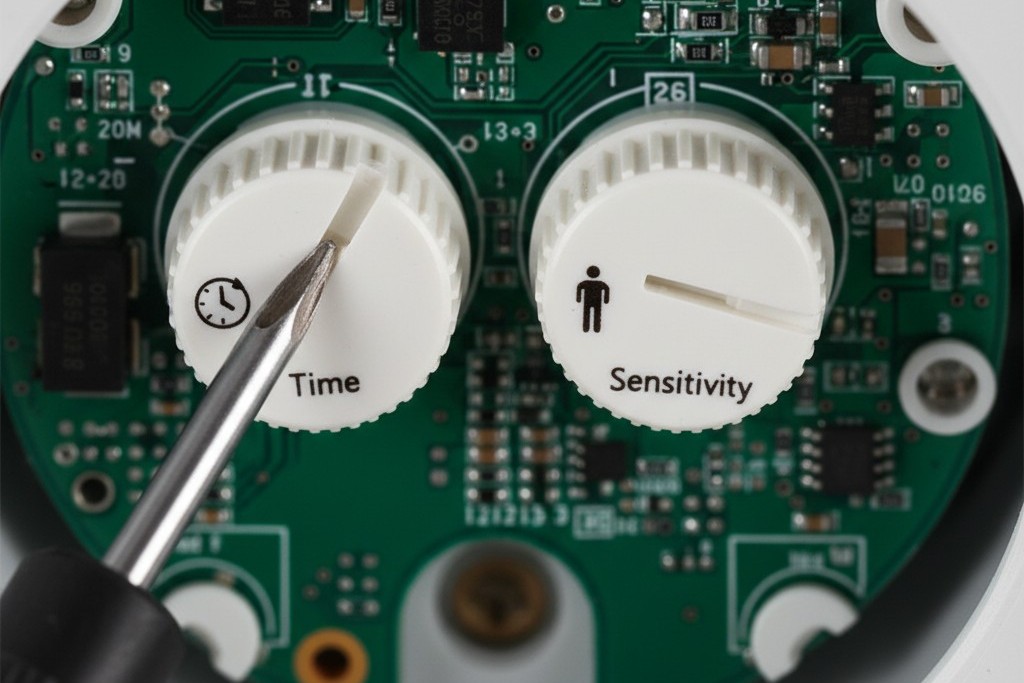
The difference between a nuisance and a luxury lies in the settings. Most commercial-grade sensors come with dip switches or dials for “Time Delay” and “Sensitivity.” Out of the box, these are often set to “Test Mode” (5 seconds) or an energy-saving 5 minutes. For a basement rec room, these default settings are aggressive and wrong.
If the basement is used for watching movies, a short time delay is a disaster. You sit still for ten minutes during a tense scene, and the room goes black. You must adjust the time delay to at least 15 or 20 minutes. This ensures that even if you are relatively sedentary on the couch, the lights stay on. Only after you have truly left the room for a significant period will the system shut down.
Sensitivity requires testing, too. You want it high enough to catch small movements (like typing at a desk) but not so high that the HVAC kicking on and moving a curtain triggers the lights. It’s a balance, but one easily found with a few days of real-world use.
احصل على الإلهام من محفظة منتجات مستشعرات الحركة Rayzeek.
لم تجد ما تبحث عنه؟ لا تقلق، فهناك دائمًا طرق بديلة لحل مشكلاتك. ربما تكون إحدى محافظ منتجاتنا هي الحل المناسب.
Final Verdict
Lighting control is about the experience of the room, not just the switch on the wall. If you have to walk into the dark to find the light, the design has failed. If the lights turn off because you stood behind a pillar, the design has failed. By moving the control to the ceiling with a dedicated sensor, you align the technology with the geometry of the space. It is a solution that respects the reality of how basements are built and how people actually move through them.







