

The walk from a detached garage to the back door is the longest forty feet in the American Midwest. In July, it is merely dark; in February, it is a treacherous, icy gauntlet where a single misstep means a twisted ankle or worse.
The standard homeowner response to this hazard follows a tragic trajectory. First comes the smartphone flashlight, held in teeth while juggling grocery bags. When that inevitably fails, there is the trip to the big box store for a box of solar path lights.
Let’s get the solar option out of the way first. If you have a graveyard bucket in your shed filled with plastic stakes that died after one season, you already know the truth. Unless you spend sixty dollars per fixture for high-end units, solar path lights aren’t lighting; they are future e-waste. They rely on cheap nickel-cadmium batteries that lose half their capacity the moment the temperature drops below freezing—exactly when you need them most. They put out five lumens of sickly blue glow that barely illuminates the plastic stake itself, let alone the patch of black ice waiting for your boot.
If you want to see the ground without rewiring the yard, stop looking at the ground. Look at the house.
The Physics of the Long Throw
Most house-mounted lights fail to illuminate a detached garage not because they lack power, but because the geometry is wrong. The default fixture on most back porches is a generic double-head floodlight equipped with “flood” bulbs. These disperse light at a wide angle, usually around 120 degrees. This is excellent for lighting up a patio deck ten feet away or annoying a neighbor, but physics is cruel to wide beams over distance.
Light intensity follows the inverse square law: double the distance, and you get one-quarter of the intensity. By the time a standard floodlight’s beam travels forty to sixty feet to a garage, the light has scattered so thinly into the night sky that it’s useless for seeing a keyhole.
¿Busca soluciones de ahorro de energía activadas por movimiento?
Póngase en contacto con nosotros para obtener sensores de movimiento PIR completos, productos de ahorro de energía activados por movimiento, interruptores con sensor de movimiento y soluciones comerciales de presencia/vacancia.
To bridge the gap without trenching, you have to stop “flooding” the yard and start “throwing” the light. This requires shifting from flood bulbs to spot bulbs. Specifically, you want PAR38 LED bulbs with a beam angle between 25 and 40 degrees.
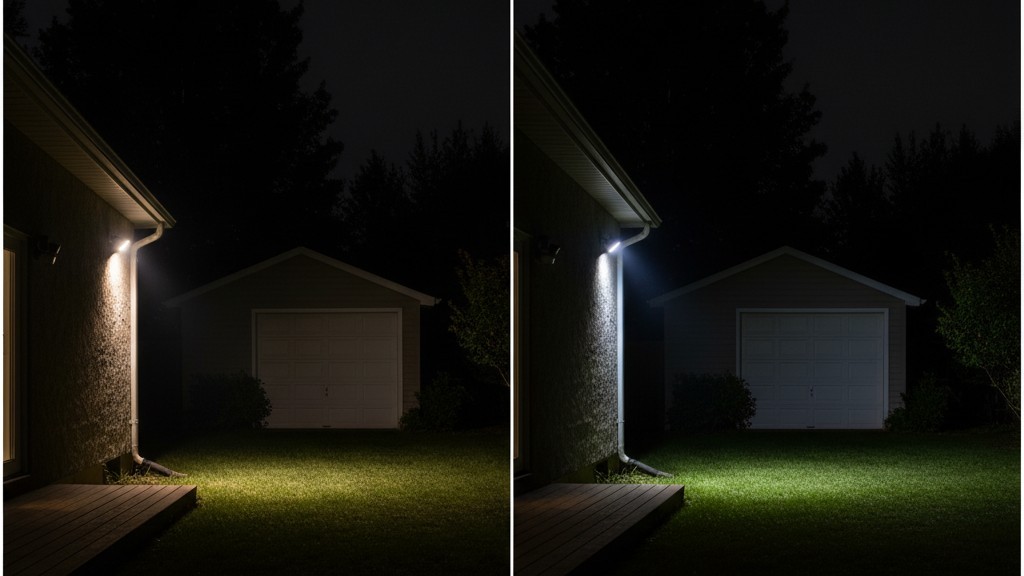
Think of it this way: A standard flood bulb is a garden hose set to “mist”—it covers a wide area but gets nothing wet past six feet. A PAR38 spot is the “jet” setting. It takes the same amount of energy (watts) and constricts it into a tight cone. In a retrofit scenario on a standard Chicago-style lot, replacing a BR40 flood (wide) with a PAR38 spot (narrow) can increase the lux reading at the garage door by a factor of ten without using a single extra watt. You aren’t creating more light; you’re just refusing to waste it on the treetops.
Hardware That Survives the Freeze
Once you accept that the light must be thrown from the house, the next failure point is the switch. A manual switch inside the back door is reliable, but it requires you to walk into a dark house to turn it on—or leave it burning all night, which is wasteful. Motion sensors are the standard answer, but generic sensors are the source of most homeowner grief.
Cheap passive infrared (PIR) sensors are notorious for “crying wolf.” They trigger when a cloud moves over the moon, when a branch sways, or when a dryer vent pumps out a puff of warm air. After two weeks of the light blinking on and off all night, most people tape over the switch and go back to darkness.
To avoid this, look for sensors that specify “pulse count” technology or “dual-technology” (microwave and PIR combined). These units require multiple verification signals before tripping. They won’t cost twenty dollars; expect to pay closer to eighty. Pay it. The difference between a sensor that works at -20°F and one that cracks is usually the difference between a polycarbonate housing and die-cast aluminum with proper silicone gasketing.
Quizás le interese

- Tensión: 2 pilas AAA
- Modo Día/Noche
- Temporización: 15 min, 30 min, 1 h (por defecto), 2 h

- Sensor de presencia PIR para montaje en techo con salida de relé de contacto seco
- Alimentación de baja tensión de 12/24VDC o 12/24VAC
- Contactos de relé aislados COM, NO y NC para entradas de EMS, HVAC y control de edificios

- Interruptor con sensor de movimiento por microondas empotrable en techo de baja tensión DC
- Entrada de 12 VDC / 24 VDC con rango de 10-30 VDC
- Corriente de funcionamiento máxima de 10A con retardo de tiempo, umbral de Lux y sensibilidad ajustables
- Interruptor con sensor de movimiento por microondas empotrable en techo para cargas más elevadas
- Entrada de tensión de red de 100-265 VAC, modelo de 10A
- Detección por microondas de 5,8 GHz con temporizador, umbral Lux y sensibilidad ajustables
- Interruptor con sensor de movimiento por microondas empotrable para techo
- Entrada de tensión de red de 100-265 VAC, modelo de 5A
- Detección por microondas de 5,8 GHz con temporizador, umbral Lux y sensibilidad ajustables
- Regulador con sensor de presencia PIR RZ037 de techo para alimentación de 220V
- Corriente de funcionamiento máxima de 3A con carga nominal de 660W
- El botón LUX controla el encendido/apagado del sensor de luz y la regulación de brillo ajustada por el usuario
- Regulador con sensor de presencia PIR RZ037 de techo para alimentación de 110V
- Corriente de funcionamiento máxima de 3A con carga nominal de 330W
- El botón LUX controla el encendido/apagado del sensor de luz y la regulación de brillo ajustada por el usuario

- Interruptor con sensor de movimiento por microondas de techo para CC de bajo voltaje
- Entrada de 12 VDC / 24 VDC con rango de 10-30 VDC
- Corriente de funcionamiento máxima de 10A con retardo de tiempo, umbral de Lux y sensibilidad ajustables
- Interruptor con sensor de movimiento por microondas de techo para mayor carga
- Entrada de tensión de red de 100-265 VAC, modelo de 10A
- Detección por microondas de 5,8 GHz con temporizador, umbral Lux y sensibilidad ajustables
- Interruptor con sensor de movimiento por microondas de techo
- Entrada de tensión de red de 100-265 VAC, modelo de 5A
- Detección por microondas de 5,8 GHz con temporizador, umbral Lux y sensibilidad ajustables

- Interruptor con sensor de movimiento PIR para montaje empotrable en techo de CC de bajo voltaje
- Entrada de 12 VDC / 24 VDC con rango de 10-30 VDC
- Corriente máxima de trabajo de 10 A con tiempo de retardo, umbral de luxes y sensibilidad ajustables

- Interruptor con sensor de movimiento PIR empotrable en techo para mayor carga
- Entrada de tensión de red de 100-265 VAC, modelo de 10A
- Detección de 360 grados con tiempo de retardo, umbral de luxes y sensibilidad ajustables
- Interruptor con sensor de movimiento PIR empotrable en techo
- Entrada de tensión de red de 100-265 VAC, modelo de 5A
- Detección de 360 grados con tiempo de retardo, umbral de luxes y sensibilidad ajustables

- Kit de emisor inalámbrico y receptor para el control de iluminación de encendido/apagado en interiores
- Receptor de 100-230 V CA, 50/60 Hz con corriente nominal de 5 A
- Interruptor inalámbrico alimentado por CR2032 con comunicación de 2,4 GHz
- Presencia (encendido automático/apagado automático)
- 12–24 V CC (10–30 V CC), hasta 10 A
- Cobertura de 360°, 8–12 m de diámetro
- Tiempo de retardo de 15 s a 30 min
- Sensor de luz Desactivado/15/25/35 Lux
- Sensibilidad alta/baja
- Modo de presencia con encendido/apagado automático
- 100–265V CA, 10A (requiere neutro)
- Cobertura de 360°; diámetro de detección de 8–12 m
- Temporización: 15 s–30 min; Lux OFF/15/25/35; Sensibilidad Alta/Baja
- Modo de presencia con encendido/apagado automático
- 100–265V CA, 5A (requiere neutro)
- Cobertura de 360°; diámetro de detección de 8–12 m
- Temporización: 15 s–30 min; Lux OFF/15/25/35; Sensibilidad Alta/Baja
And a warning on modern complications: Many homeowners try to solve this with smart bulbs or Wi-Fi integrated floodlights. While the idea of geofencing—lights turning on when your phone hits the driveway—is appealing, wireless signals struggle to punch through brick exterior walls and fifty feet of winter air. If you need a ladder to reset the Wi-Fi pairing on your light fixture, you have designed a failure into your system. Hardwired, dumb, high-quality sensors beat fragile “smart” tech in the rust belt every time.
Also, if you run security cameras, be careful. Mounting a high-intensity LED too close to a camera lens will blind the camera’s night vision. The infrared reflection from the light housing washes out the sensor, leaving you with a bright white flare on your feed. Keep the light source at least three feet away from the lens.
The Light Bridge Strategy
We call the trench-free installation technique the “Light Bridge.” It relies on mounting the fixture high—ideally on a second-story gable or the highest point of the eave—and aiming with extreme precision.
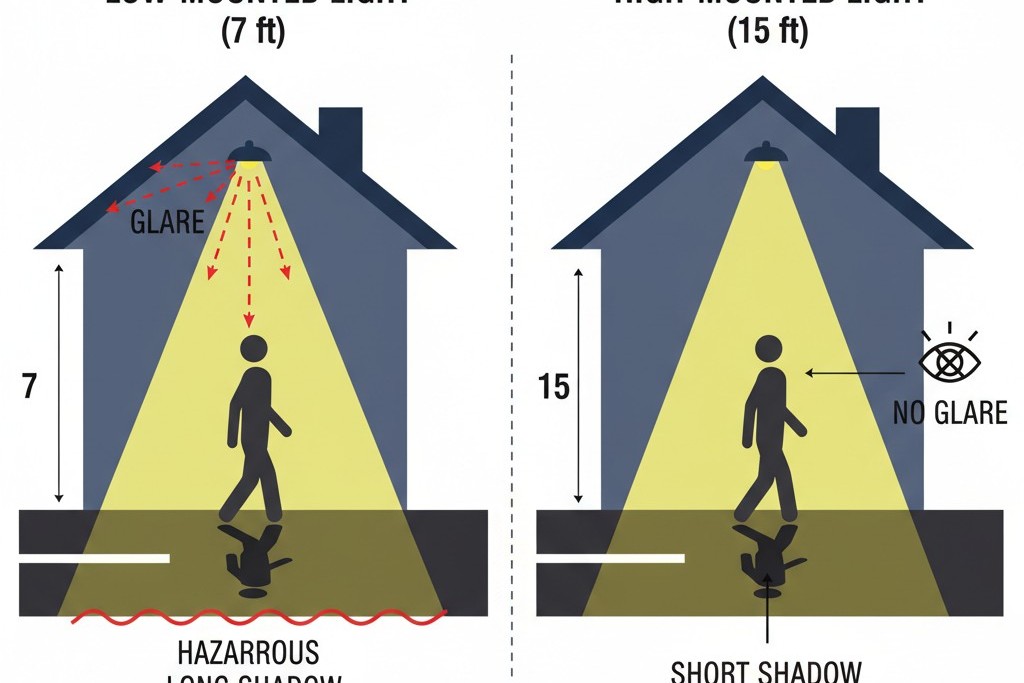
Mounting height is your friend. A light mounted at seven feet (standard door height) aims almost horizontally to reach the garage. This is disastrous. It hits the walker directly in the eyes, destroying their night vision, and creates long shadows that stretch out ahead of them, potentially hiding ice patches in the dark voids. By moving the fixture up to twelve or fifteen feet, you steepen the incident angle. The light hits the ground from above, shortening the shadows and keeping the glare out of your eyes.
When aiming a dual-head fixture, don’t aim both heads at the center of the path. Aim one head at the “landing zone”—the area immediately outside the back door where you step out. Aim the second head, the one with the tight PAR38 spot, directly at the garage door lock or the path terminus. This creates two pools of light with a dimmer bridge in between. Your eyes will naturally adjust to the gradient.
There is a valid criticism here, often raised by those who prefer trenching: lighting from behind (house to garage) means the walker’s body will always cast a shadow forward. This is true. It is the trade-off for saving three thousand dollars on conduit and labor. However, if the garage happens to have its own power source (even if there is no switched wire between house and garage), you can mirror this setup: one spot on the house, one on the garage. This creates a cross-fire that eliminates shadows entirely. If the garage is dead, the high-mount house spot is your only viable retrofit move.
Inspírese con los portafolios de sensores de movimiento Rayzeek.
¿No encuentra lo que busca? No se preocupe. Siempre existen formas alternativas de resolver sus problemas. Quizá alguno de nuestros portafolios pueda ayudarle.
The Neighbor Factor
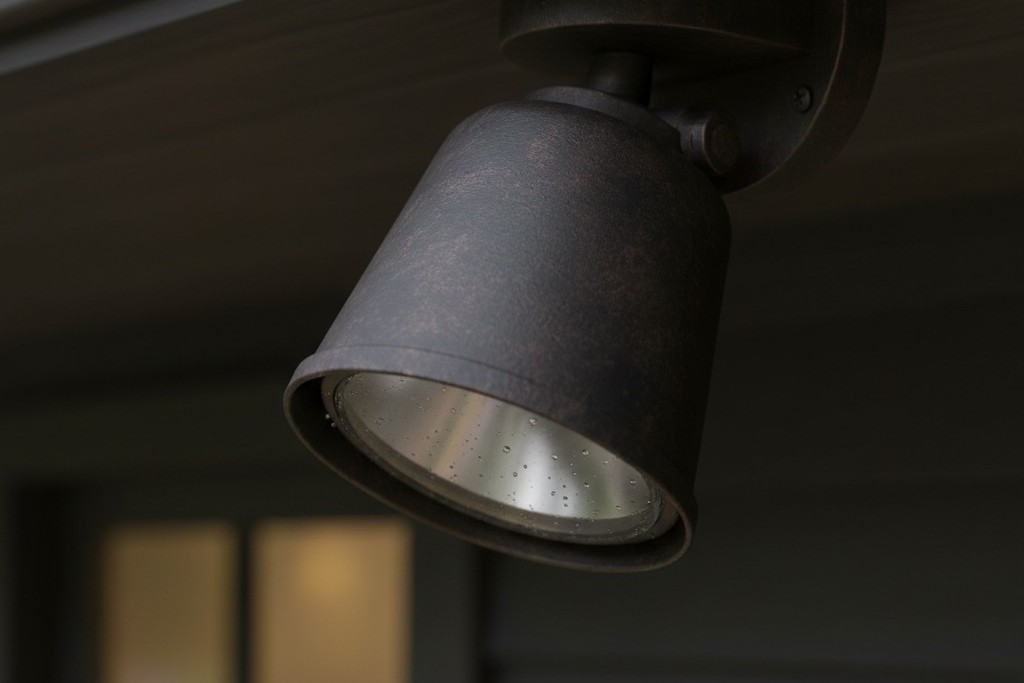
In dense subdivisions, a PAR38 spot is a weapon. If aimed carelessly, it can blast through a neighbor’s bedroom window with the intensity of a police searchlight. This isn’t just rude; in many municipalities, it’s a code violation under nuisance lighting or “light trespass” ordinances.
This is where the “shroud” or “visor” comes in. Quality fixtures from manufacturers like RAB or Kichler often come with, or allow for, deep baffles. These metal hoods extend past the lens, cutting off side-glare. If you can see the bright white surface of the LED diode from your neighbor’s patio, the light is aimed wrong or shrouded poorly. You want to see the effect of the light, not the source. Test this at night. Walk to your property line. If you have to squint, get back up the ladder and adjust the angle down.
Maintenance Reality
Finally, remember that physics works both ways. A sensor lens covered in spider webs or hard water deposits cannot see your heat signature. A lens wiped with a dry rag will scratch, diffusing the beam and ruining that tight throw you calculated.
Once a year, usually in late autumn before the ladder becomes dangerous, go up with a microfiber cloth and a mild cleaner. Wipe the sensor lens and the bulb faces. It takes five minutes, but it ensures that when the February freeze arrives, the light will be there to guide you home.







